These coffee filter Christmas trees are insanely easy!

I love an easy kids holiday craft. This one is for kids of all ages and is so simple you could make them in your sleep! We’ve teamed up with Floracraft to show you how to customize your holiday decor and really put your own spin on something that has been done before.
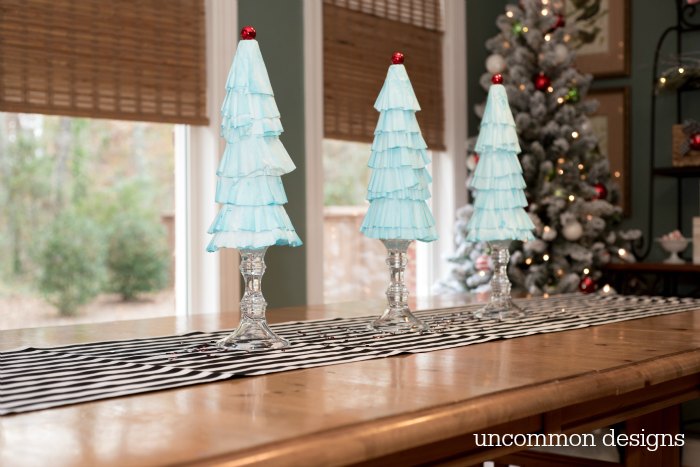
Sometimes I get something in my head and just won’t be satisfied until it is finished just how I dreamed it up. I’m pretty sure it is a disease or something… do you think? This year I wanted icy blue on my kitchen table. Something that would brighten up the table and match my giant hanging snowflakes and my 5 minute no-sew striped tablerunner. The problem was that there were none to be found in that exact color. What is a girl to do?
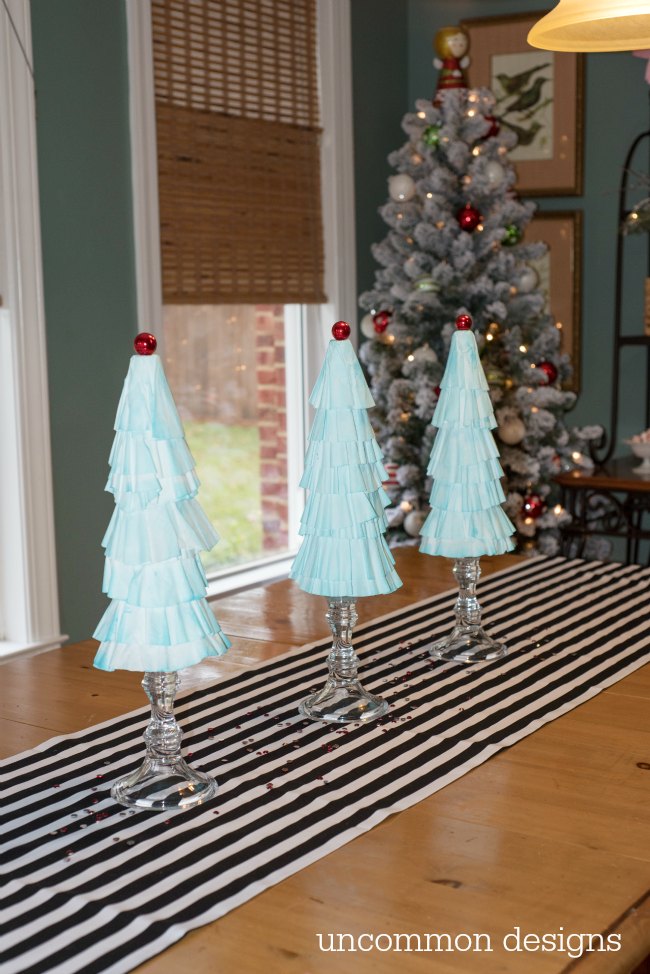
Make her own! I saw a really cool tabletop tree made from fringe inside Floracraft’s Christmas E-book. The lightbulb went off and I knew what to do. I decided that I would use foam cones to make tabletop trees for my kitchen table. I needed something really inexpensive to finish them off that I would be able to paint in my can’t- get-it-out-of-my-head icy blue color. Coffee filters would be perfect and I already had them in the pantry.
Let’s learn how to make them…
Coffee Filter Christmas Tree Tutorial
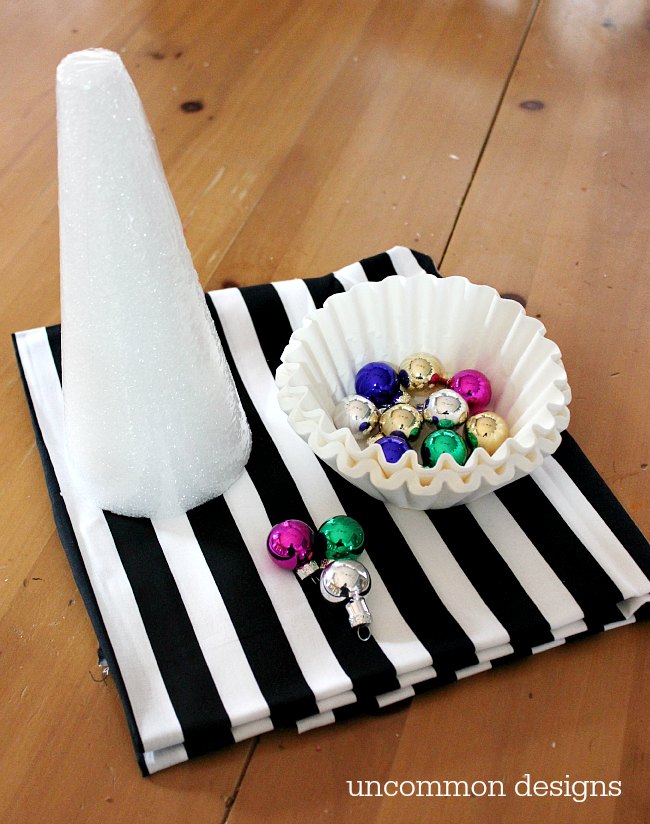
Supplies Needed:
- FloraCraft® Make It: Fun® Foam Cones
- Coffee Filters
- Acrylic Paint
- Miniature round ornaments
- Hot Glue Gun/ Hot Glue Sticks
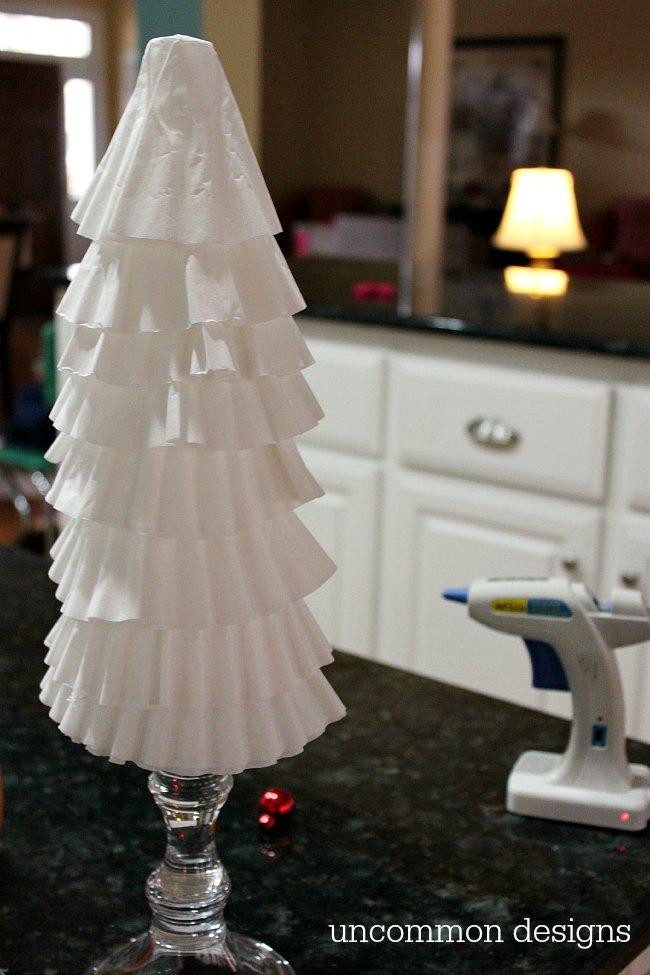
Step One. Grab a stack of 4-5 coffee filters. Fold them in half and then in half again. Now you want to cut around the folded line (where the sides of the filters meet the bottom). You should end up with a stack of filters with a hole in the middle. Just slip that entire stack onto the top of the cone and repeat. With each layer, cut a smaller hole so you’ll have distinct layers. For the top layer, no need to cut a hole. Just put hot glue on the top portion of the cone and place one more stack of filters on the top and squeeze it to adhere it down. You may want to glue down the other layers to your liking. I just did the top, but it is up to you!
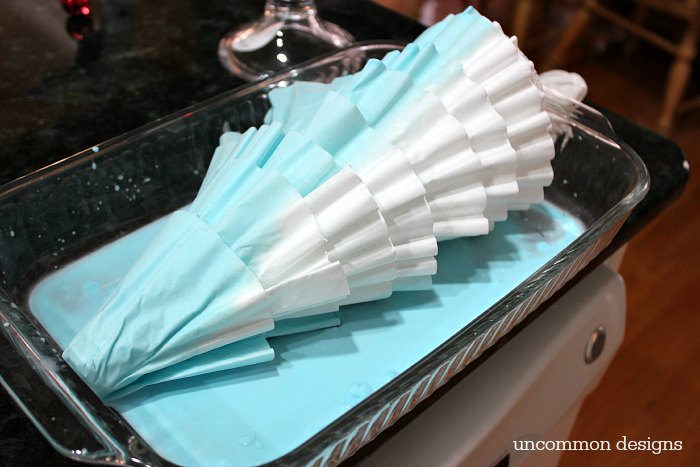
Step Two. This is where your color is applied. I mixed a bath of 1 part acrylic paint and water and stirred it inside of a glass casserole dish. When your color bath is ready, just submerge the tree and turn it slowly. You may want to gently squeeze off some of the excess at this point.
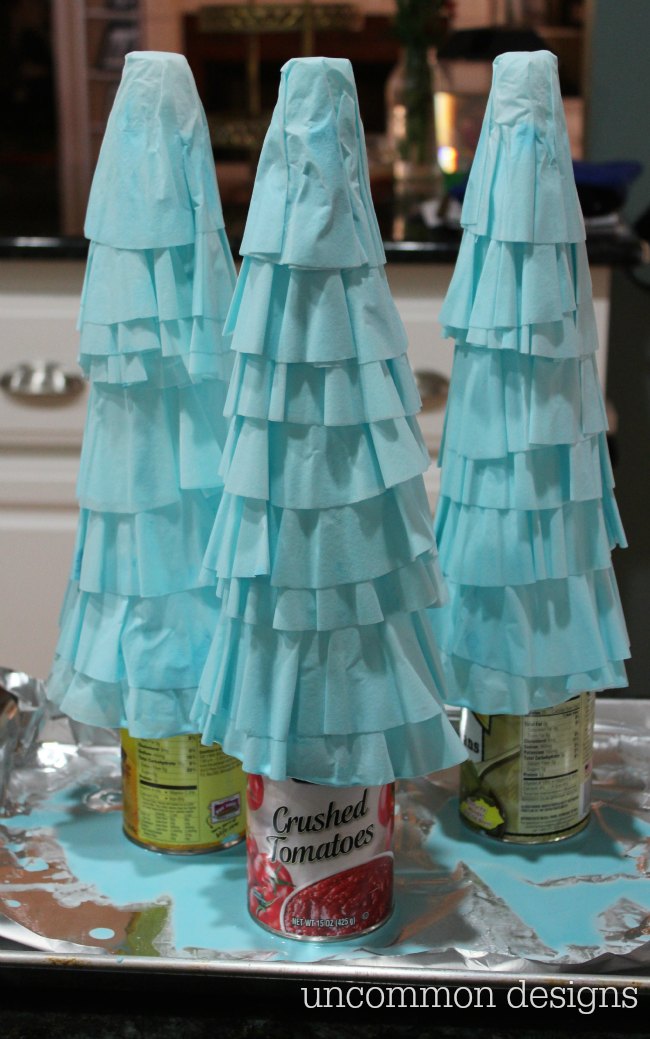
Step Three. Since the paint is diluted it can get a bit messy. I lined a cookie sheet with aluminum foil and bent the edges up. I also grabbed some canned veggies from the pantry to act as my candlesticks. Let them dry… it took mine overnight to be dry enough to be moved.
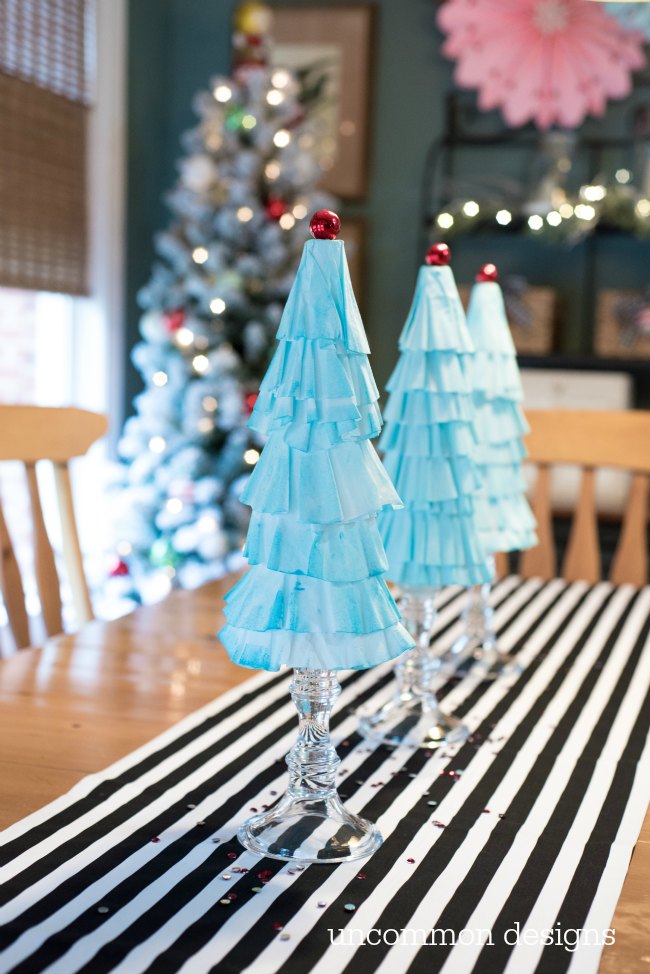
Step Four. Top them off by removing the cap from the ornaments and gluing them on top. Voila! All done! I placed mine on clear candlesticks and they are just what I wanted. They almost have a watercolor effect, which I adore!
A big thank you to Chasing Butterflies Photography for taking photos of the trees!
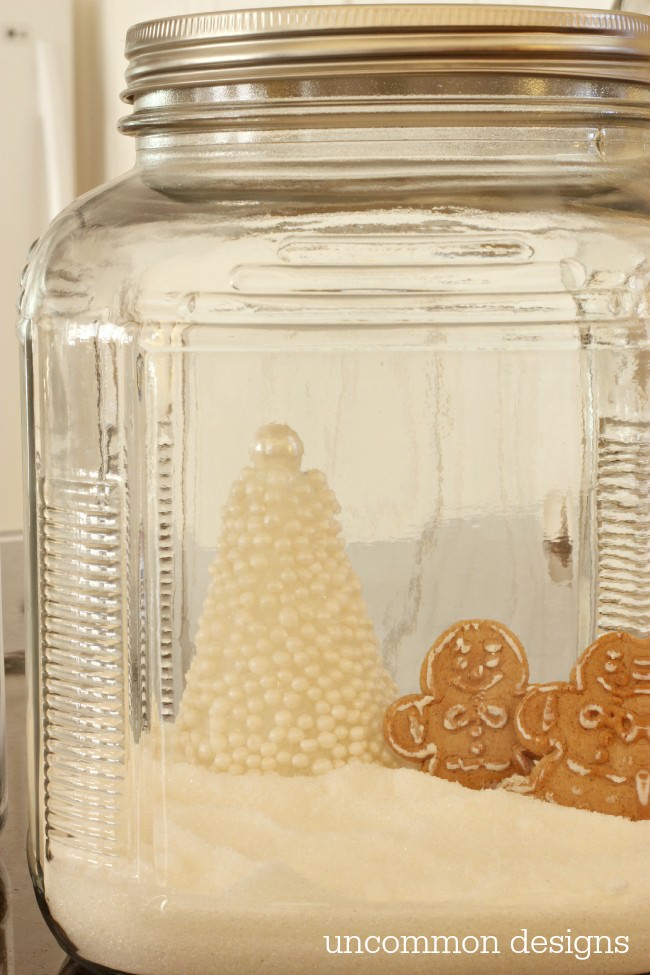
You can also use the same cones to make a Christmas display with sprinkles trees!
Trish Flake
Latest posts by Trish Flake (see all)
- Easy Leopard Painted Pumpkin - October 18, 2021
- Embroidered Swedish Dishcloths - May 3, 2020
- Easter Egg Decorating Party - March 21, 2020
Leave a Reply