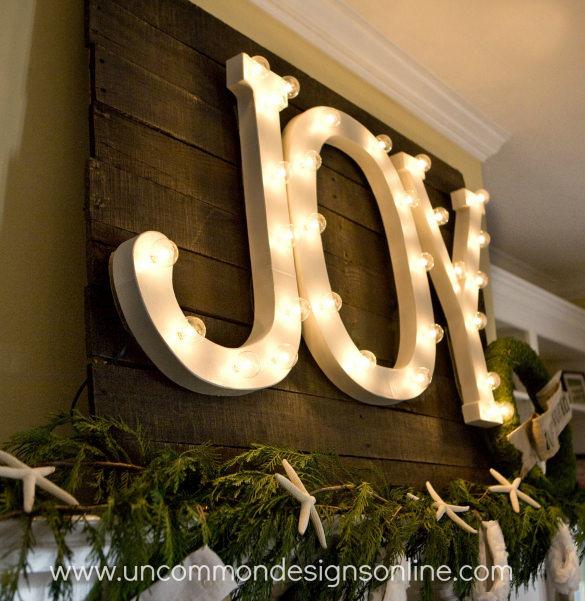
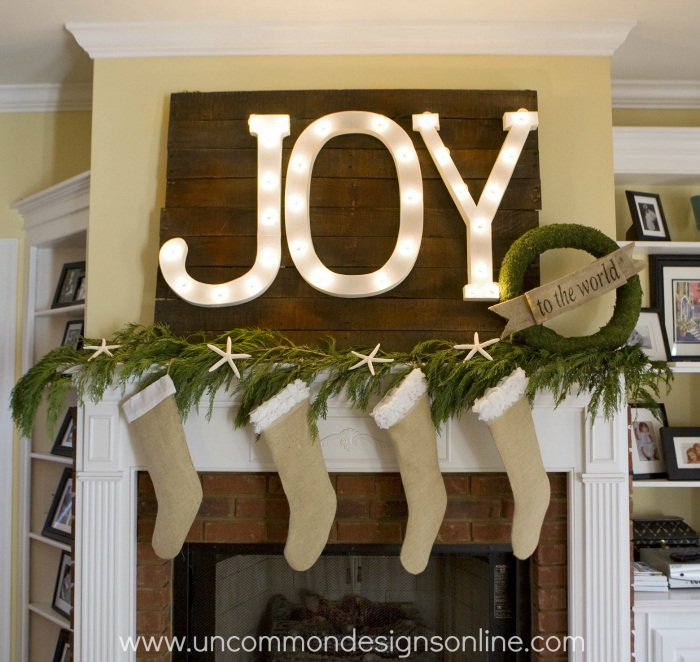
I just can’t thank all of you enough for your kind words about my Joy to the World Mantel. My family has really been enjoying it and it is a constant reminder for me to find the joy in all of the holiday madness and really remember what we are celebrating. I know that many of you have asked, so here it is…
Marquee Letters Tutorial
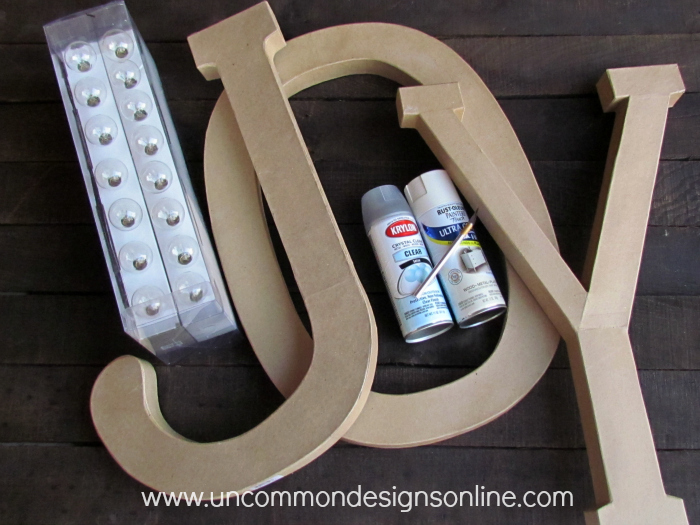
Supplies: {affiliate links}
- 23.5″ Paper Mache Letters : “J” HERE , “O” HERE , “Y” HERE
- Spray Sealer
- Vintage White Spray Paint (I used Rustoleum’s Heirloom White)
- Umbrella Patio lights ( I purchased the 30 pack from World Market)
- X-acto Knife
Step Two. Turn your letter over so the back (and wrong side) are facing you. You want to cut the top layer of your paper maché with your knife about half and inch from the outer edge. I also left about half an inch one side attached, so it would function like a door. Just open it up and you will see all what is pictured above!
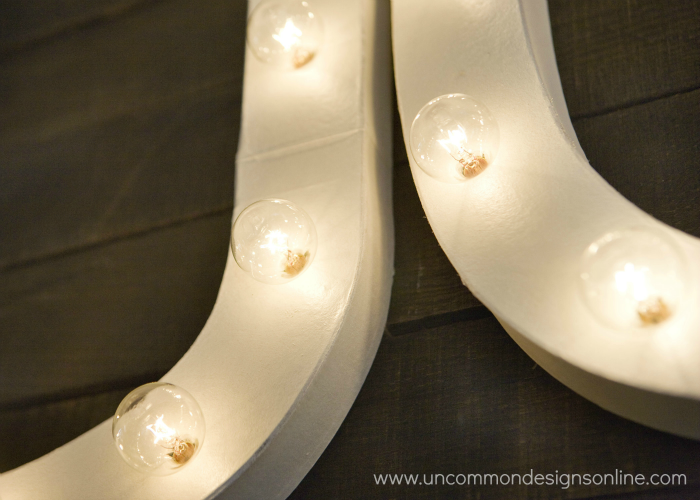
Step Three. Now we want to turn the letter back over and get it prepared for the lights to be installed. Because I had 30 lights and 3 letters, I allotted 10 lights per letter and tried to space them evenly. I simply scored an x where I wanted the holes to go and kind of punched it in with the other side of the knife.
Step Four. Now it is time to put in the lights. You need to plan where you will be plugging them in and start threading the lights closest to the outlet. In my case, I started at the bottom tip of the J. You will unscrew the bulb from the strand and then screw it back in through the front of the letter. As you move on to the next light, just tuck the excess into the frame of the letter. You may need to trim away some of the inside cardboard to make everything lay flat. Once you get to the tip of the letter, move over to the next until you are done! I simply mounted the letters on a wood pallet background with tiny nails and was good to go!
Here are you Joy ” letters in light”! We just love them! Hope you all are enjoying all of the holiday preparations!

For other great holiday ideas and tutorials we have you covered!

Trish Flake
Latest posts by Trish Flake (see all)
- Easy Leopard Painted Pumpkin - October 18, 2021
- Embroidered Swedish Dishcloths - May 3, 2020
- Easter Egg Decorating Party - March 21, 2020



Oh my goodness! Yes! love this idea! Would you pretty please link this up to our blog hop?? Thank you!
xoxo, Jordan
http://www.lilywhite-designs.net
Like I said before….I think this is the most fabulous thing ever!
–Katie
Brilliant!
Marie @ Lemondrop ViNtAge
I am having a fabulous holiday giveaway right here.
I am in love! I have to find a place to do this in my house!!!! Great idea!
~Amanda
http://Www.thesunshinetoker.com
Love it!!
Brilliant
LOVE this. i’ve always wondered what was inside those cardboard letters! 😉
Brilliant!
So happy to see the tutorial!! You’re so creative! I love it!!!
This came out SO fantastic! I really want to use this idea to create a non-nightlight nightlight for my 5 and 6-year-old boys’ room. SUPER cool!
The JOY letters are stunning. It’s a fabulous!! Fabulous project!! The whole mantel is beautiful Trish.
Are you kidding?! This is seriously amazing.
Can’t wait to make! Thank you for the beautiful idea! 🙂
Merry Christmas and much JOY to you and yours!
Love it!! Would you be able to explain a little more about how you mounted them to the wood?
I just put a few finishing nails in the pallet and then mounted them by pushing the letters on between the cut back and the upper edge. Hope that helps!
these really are awesome!!
I am in love with this idea! Amazing! xo
Very clever!! I would have NEVER thought to do that. SO pretty!
Crazy cool! I am SO going to do something like this… I will just have to come up with the perfect project! Thanks for the great inspiration!
Jaime
This is the best use of paper mache letters I have ever seen!!! It looks awesome on the mantel!!! Love the wood behind it!
I love it!!! So darn creative and SO FUN!!!
Great job!
Jen
athomeinthenorthwestblog.com
i would love to know after tucking the lights into the letters did you then hide the rest of the wire behind the wood. ? i dont see any wire trailing across the front to the next letter.
This is where the pallet comes in super handy! I simply tucked the cord between the slats where it was showing and didn’t worry about a few inches showing here and there. Hope this helps!
Take care,
Trish
What lights do you use that won’t burn the letters?
The umbrella lights from World Market that I used don’t get hot. I don’t know if they are all like that, but these have worked well for us!
Take care,
Trish
How do you utilize the lights so they don’t show cord between each letter? This is pure genius!!
I just tucked them between the slats of the pallet. Nothing exact just a little push here and there.
Take care,
Trish
Live this! Can you give a few more details how you put the pallet together?
Can you tell us how you finished off the letters so they stay closed after you have inserted the light strands?
Appreciate the project. Thank you for sharing.
What kind of spray sealer did you use?
Hello. Such a beautiful project. I cannot pin it due to no image. Is it possible to fix this? I need the details instead of relying on my memory!!!! Thanks.
Hmmm..not sure what you mean? We have a pin it button on the image?
I am so fired up about doing this! Drove 45 minutes to get my (on sale) letters yesterday! Where did you get the pallet? I have access to some but they have spaces between the slats. Thanks for the great idea!
Love these letters!! I just ordered the letters to make one of these. What size did you make your pallet board? And what kind of sealer did you use. Thanks
How did you do the letter Y? Also, what size is the pallet board and what kind of wood did you use?
Love the JOY. Thank you for sharing!
I am wondering about when you cut the letters open and leave part of the back attached like a door. If it is like a door, how do you keep it shut after putting the lights in?
Love the idea but I am concerned about the paper mache letters and the lights. What keeps the lights from getting hot and burning the paper mache? Do the lights stay cool? Concerned about a fire hazard.
Hi Sandee! The umbrella lights from World Market that I used don’t get hot. I don’t know if they are all like that, but these have worked well for us!
Take care,
Trish
Read more at https://uncommondesignsonline.com/joy-letters-in-light/#1kjcv5rdkUcQOWWM.99
Such a fantastic piece and I would want to keep the display up all year-you have such a beautiful site- we have lots more to explore on it! Lou and Abby
Can’t wait to make! Thank you for the beautiful idea! 🙂
How did you do the letter Y? I see you started from the top but I was not too sure how you finished it.
Also, what size pallet did you use and what kind of wood is it?