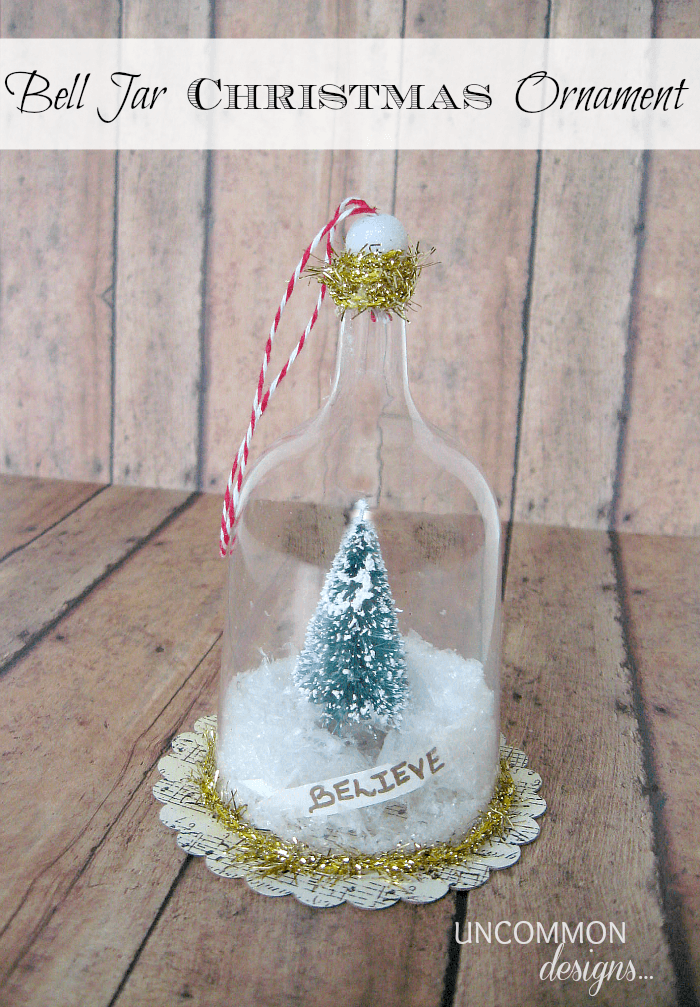
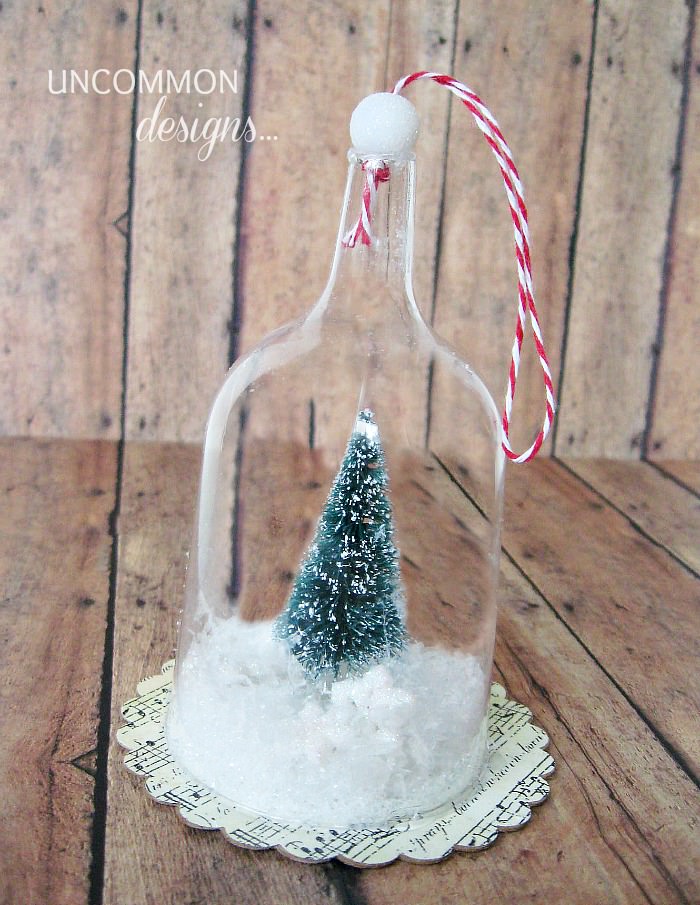
So, everyone out there got ALL of their Christmas crafts made this year right? Yea, neither did we! But, don’t worry, today I am going to show you how to make these beautiful, vintage inspired Bell Jar Christmas Ornaments…
I so wanted to get some of these made for Christmas but it did not happen! My son thought this was “so cool” when he saw this one finished. Hey, I got the 10 year old boy seal of approval? SWEET! Let’s get started…
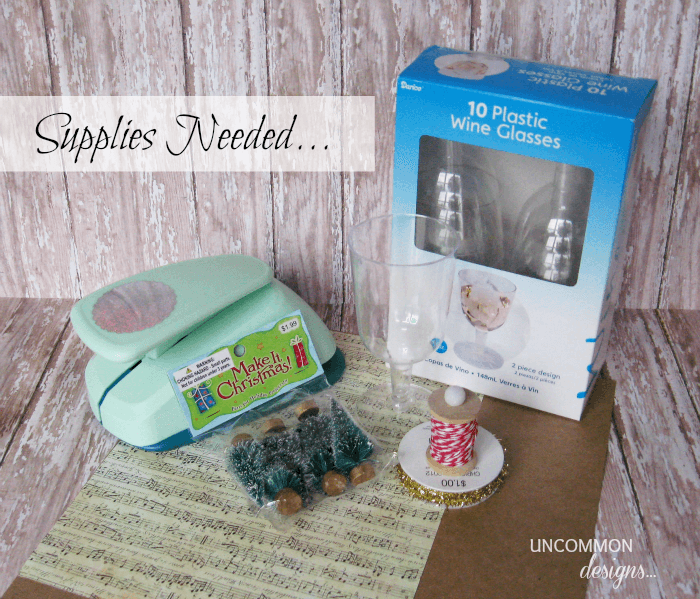
Supplies Needed for Bell Jar Christmas Ornaments…
- 2 Piece Plastic Wine Glasses
- Mini Trees
- Large Scalloped Punch
- Gold Tinsel Ribbon
- Red and White Striped Baker’s Twine
- Sheet Music Scrapbook Paper
- Heavy Duty Brown Cardstock
- Faux Snow
- Medium Sized White Bead
- Paper Modge Podge
- Glue Gun and Glue Sticks
- Misc. Snowflakes,mini banners,trinkets to place inside
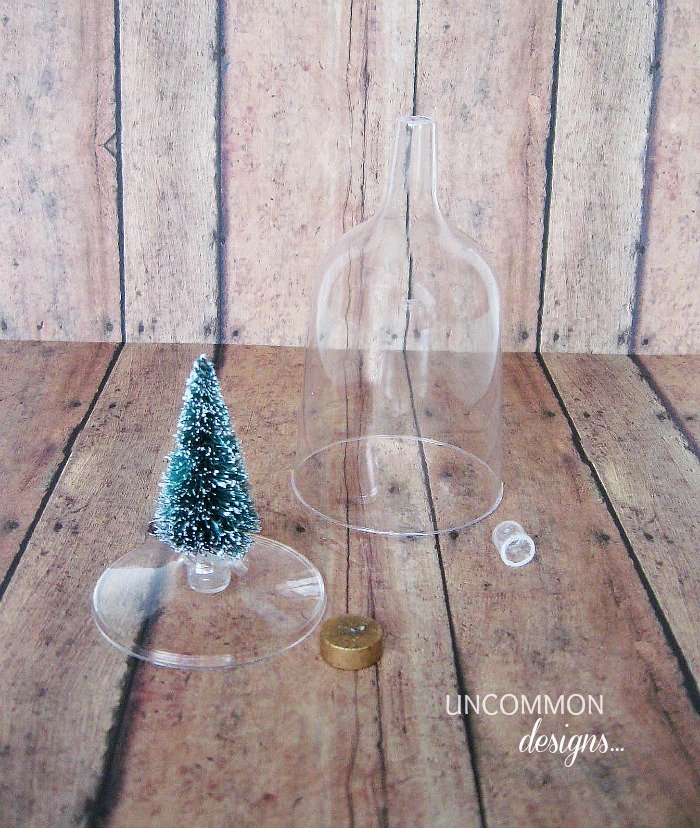
First, remove the wooden bottom off of the mini tree. Glue the tree in the center of the base of the glass by simply putting some hot glue down in the base and place the tree in it. Next, you will cut the tip off of the bottom part of the large piece of the glass. This will allow it to be open. This requires you to be extremely careful. Use you safety skills of dealing with sharp objects! I used a very sturdy and sharp knife and “scored” the tip by sawing gently around the entire tip multiple times until I felt it give a little and then it popped off.
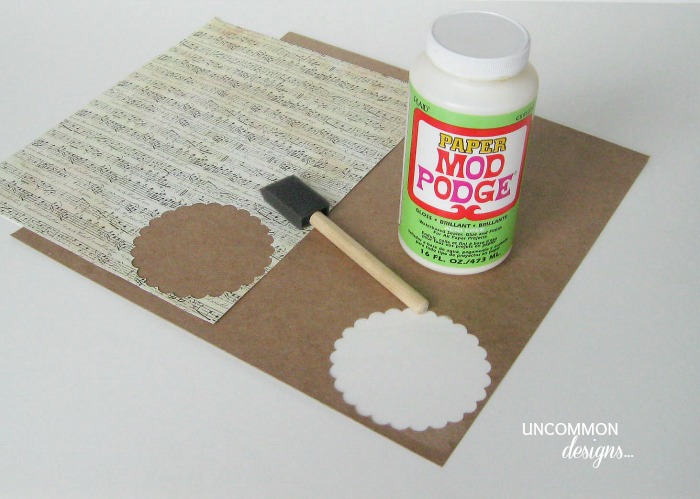
Now, you will punch out a scallop circle of both sheets of paper. Use a foam brush to apply a layer of Modge Podge to the paper and press them together. Allow them to fully dry.
Take your baker’s twine and cut a length long enough to double over { about 6-7 inches }. I wrap tape around the ends of the twine to help thread it through the bead. Once you thread the twine through the bead, tie a knot in the end about 1 inch up. HINT: Make sure your knot is large enough not to pull back through bead! Place your little trinkets carefully on the base. Use your hot glue gun to apply glue to the bottom rim of the glass and press down the rim of the glass over the base with the tree, centering it on the scalloped paper base. Once it is dry, carefully add some faux snow through the opening in the top of the glass stem.
Apply a thin amount of hot glue to the rim of the stem, where you cut it off earlier. Once you cut off the tape at the bottom of the twine, place the knotted end of the baker’s twine down in the stem and gently push the bead down to adhere to the glue. How cute is this looking! Love!
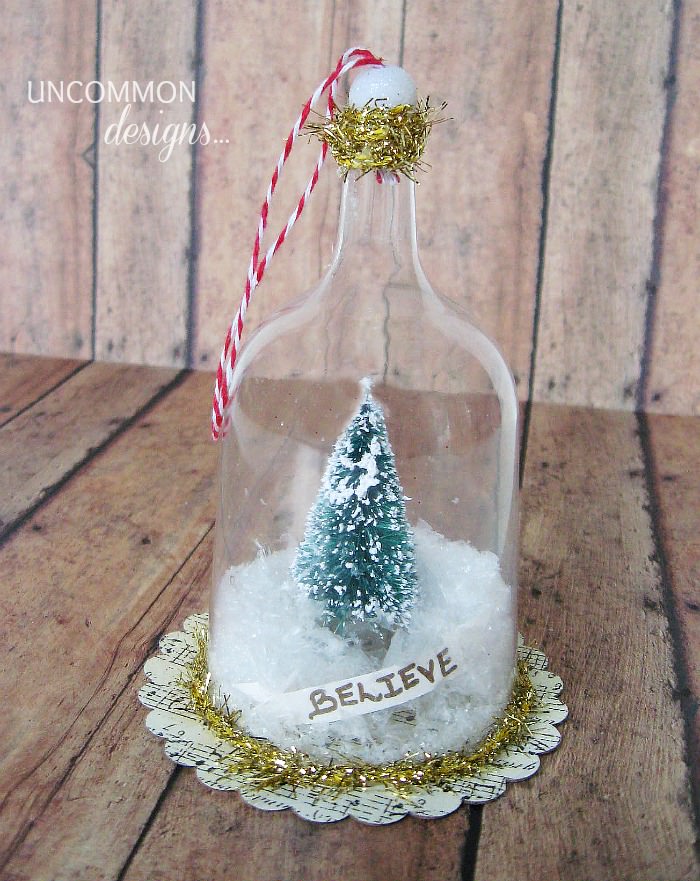
The final step is to apply the gold tinsel ribbon around the base of the glass and around the top of the stem with your glue gun. How sweet did this turn out..it is beautiful hanging on the tree with all the lights surrounding it!
I know Christmas has already passed, but now I will be ready for next year!
Have you checked out our Mr.and Mrs. Reindeer ornaments or our Holly Wreath Personalized ornaments? We have lots of Ornament Inspiration here at Uncommon Designs.
ENJOY!
Bonnie
Trish Flake
Latest posts by Trish Flake (see all)
- Easy Leopard Painted Pumpkin - October 18, 2021
- Embroidered Swedish Dishcloths - May 3, 2020
- Easter Egg Decorating Party - March 21, 2020

What a fantastic series and what a great ornament. Genius to use the plastic wine glasses! Totally pinning.
We’re on the same wavelength … I’m starting a monthly Christmas series next week! 🙂 I’m hoping it’ll eliminate the December rush.
Such a fun idea to have Christmas all year round! I love this ornament!
Very cute! I love all the little Christmas tree projects this year!
–Katie
Trisha and Bonnie, this is adorable! It is definitely never TOO early to start working on projects for my very favorite holiday. This would be a great gift, too. Thanks for the inspiration and have a great weekend! ~Cindy
What a cute idea – love the little Christmas ornament – would make an adorable place card too! 🙂
Fantastic idea… no more December dash!!
Great idea! Thank you for sharing. I will be looking forward to you upcoming tutorials for christmas. Yes, I still need to finish my ideas!
I loved this one – saw it somewhere in blogosphere! I pinned it for ‘someday’!
Genius…and sooooo cute! I love it!
Keeping Christmas crafting going throught the year, how fabulous! This is just adorable! I made some of these on my blog around the holidays( http://www.mysocalledcraftylife.com/2012/11/06/diy-vintage-inspired-bell-jar-ornaments/ ). You can use a dremmel with the grinder wheel on it to cut the tips off the stem of the glass too. I’d love for you to stop by sometime and say hello. Your blog is lovely!
Cheers,
Ashlee
http://www.mysocalledcraftylife.com
Keeping Christmas crafting going throughout the year, how fabulous! Your ornament is just adorable! I made some of these on my blog back during the holidays ( http://www.mysocalledcraftylife.com/2012/11/06/diy-vintage-inspired-bell-jar-ornaments/ ) You can also use a dremmel to cut the tips off of the stems. I’d love for you to stop by my blog and say hello sometime! Your blog is lovely!
Cheers,
Ashlee
http://www.mysocalledcraftylife.com
I made 20 of these for Christmas. They were so adorable! I love how you used the base of the wine glass to elevate the trees. I used Golden Molding Paste to build up all the miniature figurines on my 3″ round. All the ornaments looked fantastic on our tree and were perfect for a non-breakable tree to detract our curious kitten. I squealed everytime I made one because they were so cute! I kind of hated giving them up, but everyone loved them. I did keep a few for myself. 🙂
It’s fabulous, and I plan to make at least one of these! I’m on board for making Christmas stuff all year long, so I’ll be ready next year. Can’t wait to see what you’re making every month!