
Alright all of you sweet folks who were requesting tutorials on projects from my Joy to the World Holiday Mantel, here is the first one…
How to Make a Wired Burlap Wreath Banner

To make this wired burlap wreath banner, you only need a few key supplies: Burlap, floral wire, hot glue and glue sticks, paint, paintbrush, a stencil for your letters, and glitter spray.
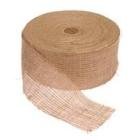
We were given a chance to try out some of BurlapFabric.com’s rolls of 6″ wide burlap, so I cut about double the length that I wanted my banner to end up being. This is where the 6″ burlap ribbon works so wonderfully…

All you have to do is fold over the side of the burlap, insert the floral wire, and hot glue in place. Easy peasy! Do the same with the other side, but you may want to iron over more, depending on how wide you would like your banner to be. Make sure to have the floral wire extend all the way down to the very tips of each side.

Now you will snip in the angled edges at each end and you are ready to stencil your lettering!

I used my Cricut to cut out a freezer paper stencil. Don’t you love the fancy design my freezer paper came with? Just kidding! The girls thought that it made a wonderful art paper roll and mommy just thought that was fantastic… right! Anywho… I then painted in the letters with black acrylic paint and let it dry.

The next step is to fold each tip toward the middle just beyond the lettering toward the back side.

You will simply fold out the sides so that they will go past the first crease that you made.

Now you can glue or pin your wreath banner in place and you are done! Voila!

Here it is again as part of my Joy to the World Mantel. Don’t worry… we will show you how to make the Joy lighted letters in just a few days! Enjoy decorating your homes and preparing for the holidays!
Trish Flake
Latest posts by Trish Flake (see all)
- Easy Leopard Painted Pumpkin - October 18, 2021
- Embroidered Swedish Dishcloths - May 3, 2020
- Easter Egg Decorating Party - March 21, 2020
Thanks for sharing this tutorial. I love your burlap wreath, it is just my style earthy and rustic. ;o)
Oh, I just love this! Beautiful. 🙂
I love this! I’m going through a burlap phase where I want to use it on everything so I’m going to have to think of where I can use a banner like this! And your mantle is amazing!
I thought that might be how it’s done. Have all of this one hand (sick) I have so much cleaning to do and I bet I’ll be doing this instead! Love it! Great tutorial!
Stunning effect with the entire mantle! Love it : )
I love that! Thanks for the tutorial and inspiration. Merry Christmas.
Trish – your mantel is just beautiful. You did an awesome job. The tutorial on the burlap banner is great. Thanks for sharing it with us.
Judy
Trish,
Not only did I LOVE your mantel…you received the most viewed hits from my party last week, so you will be featured at my party on Monday. Please feel free to grab my starfish featured button for your blog.
Blessings,
Linda
I’m in love! Another fabulous idea!!
Kelly
This is the coolest, most original project I’ve seen in ages! Crazy clever!
I would have never thought of making my own wired burlap. So brilliant. And I am DYING over your JOY!!!
Love x a million! Greatest wreath ever.
“Simply” beautiful!
The wreath is absolutely fabulous. The whole mantel is.
But you want to know my favorite part of this post? The scribbled on stencil. I can’t tell you how many times my craft supplies have been scribbled on. Or how many times I’ve taken a legal pad to a meeting only to flip a page and find some “artwork.”
Beautiful Christmas mantel and wreath; it is one of my favorites I have seen this year! You are amazing!
Love this and what great ideas! Thanks girlies, Laura
Perfect! Thanks so much!!!
I love it! Great tutorial and I’m pinning this to make my own sometime. Brilliant little idea! 😉
This entire mantle is unbelievable! You guys are so creative I love it!
I just LOVE this holiday mantel. When I see mantels like this, I hate the tv over mine even MORE! Oh well. Trying to work around it….
For me, the small things really make a difference and I really like the touch of the star fish on this mantel. PLUS, this mantel has just the right amount of “stuff” going on…not too much, not too little….love it.
…wishing I had a Cricut…….
If I get a wreath up on the front door in the next few days, I’m totally putting a banner like this on it!
What a great idea! So pretty.
I adore this so much! I never would have thought to add wire. So cool and practical!!
Well this is too clever! Excellent way to stiffen the burlap, looks so Pottery Barn with a ching-ching price tag!! I love this and your entire mantle! Can’t wait to see your tute on the JOY letters!! Fun!
Ouuhhh I’ve never thought to add wire to burlap ribbon. Trish, you are one creative genius! 🙂
Wow, that is such a great idea! You could do it with fabric as well, the possibilities are endless. What a great addition to your stunning JOY sign. You are so cre8tive!
Just found your blog via Pinterest and absolutely LOVE it! You are so talented…thank you for sharing your ideas! I just made a Valentine’s wreath with a little banner like this and am in love with it…thanks for the great tutorial! 🙂
Here is my Valentine’s version. Thanks again! 🙂 http://www.lifesweetlifeblog.com/2013/01/the-proof-is-in-pin-volume-5.html
Here is my Valentine’s version…thanks again! 🙂
Trish,
I must have missed a step…the glitter spray, was this used to give the sweet banner a little sparkle?
Thank you so much for the tutorial…never would have thought of floral wire. So much stronger than just using the pre-wired burlap you find in the ribbon section!