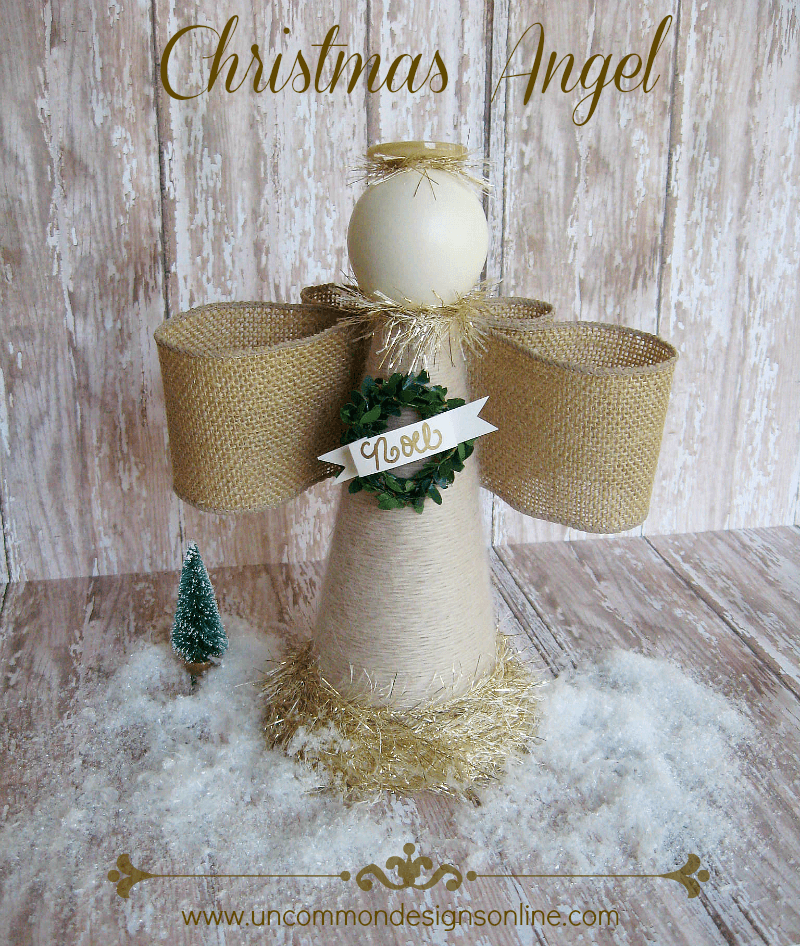
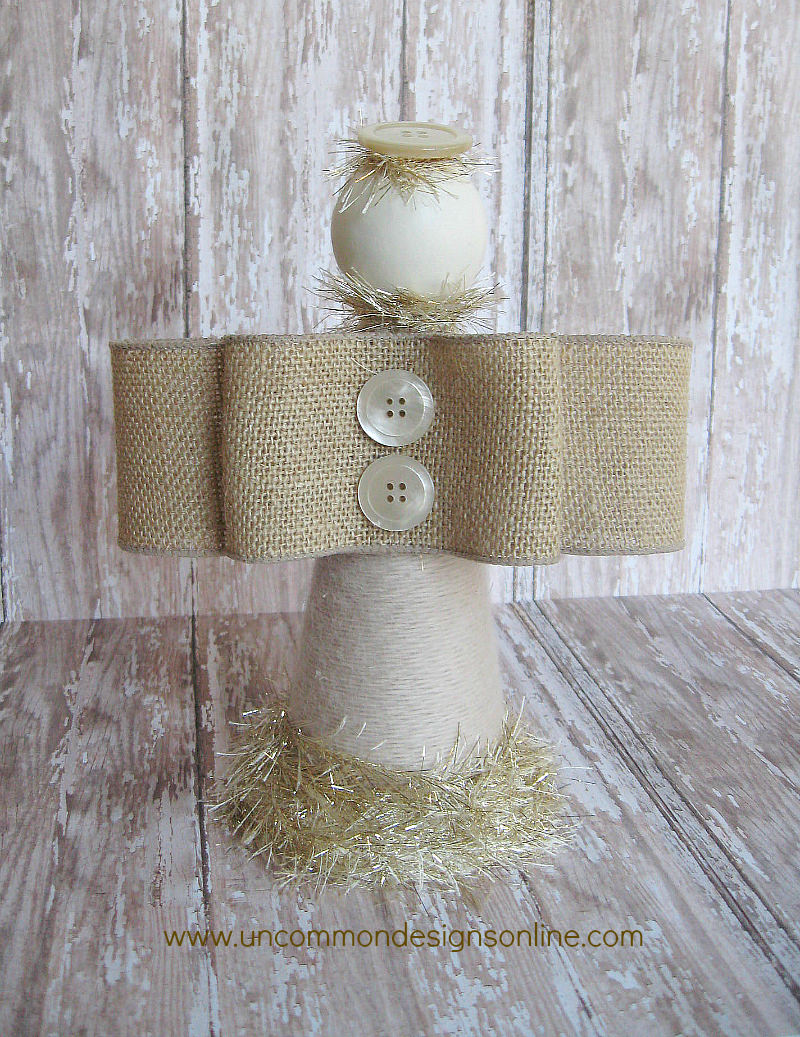
Today I am so excited to show you how to make this precious Christmas Angel…
Isn’t she adorable! I love the neutral tones and textures. I am a sucker for burlap, and those little burlap wings are just what I wanted for my little Christmas Angel!
So, let’s get started!
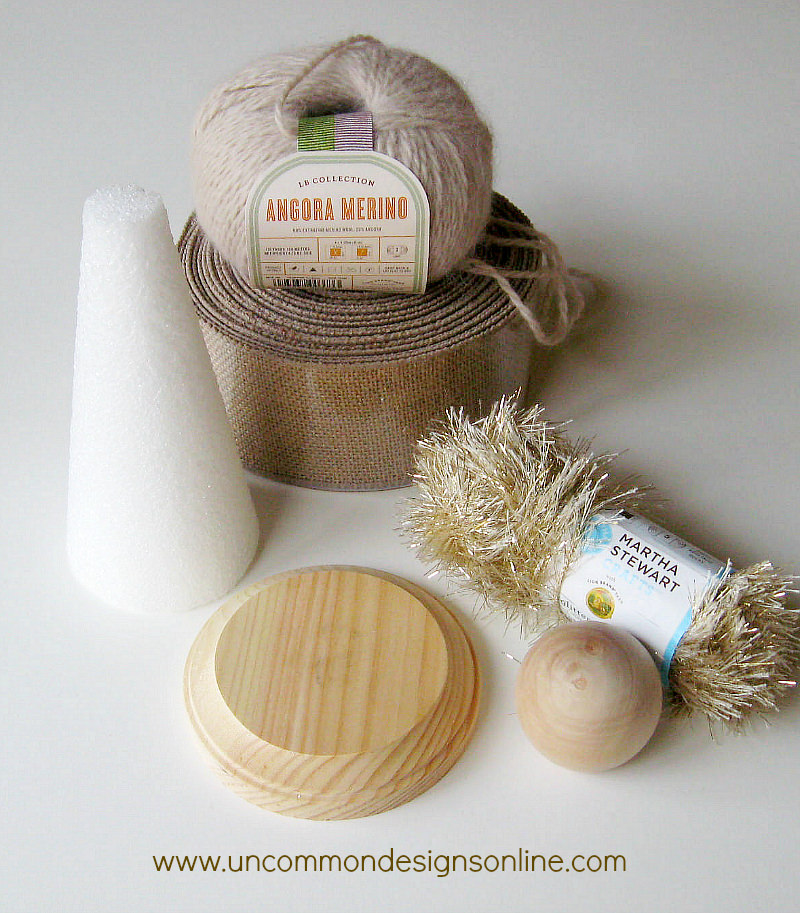
Here are the supplies you will need to create your own little Christmas Angel…
Cream Colored Yarn { I used Martha Stewart Angora Merino yarn }
Glittered Gold and Cream Eyelash Yarn { I used Martha Stewart Eyelash yarn }
Round, Wooden, Flat Bottomed Ball
Styrofoam Cone
Round Wooden Disc
Cream Spray Paint { I used Rustoleum Heirloom White }
2 Medium Sized Cream Buttons and 1 Large Cream Button
Faux Mini Boxwood Garland { Consumer Crafts }
Gold Metallic Sharpie
Cream Cardstock
Hot Glue Gun and Gluesticks
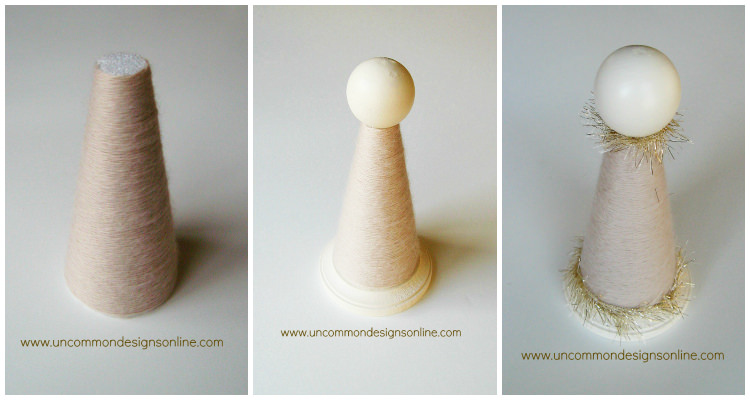
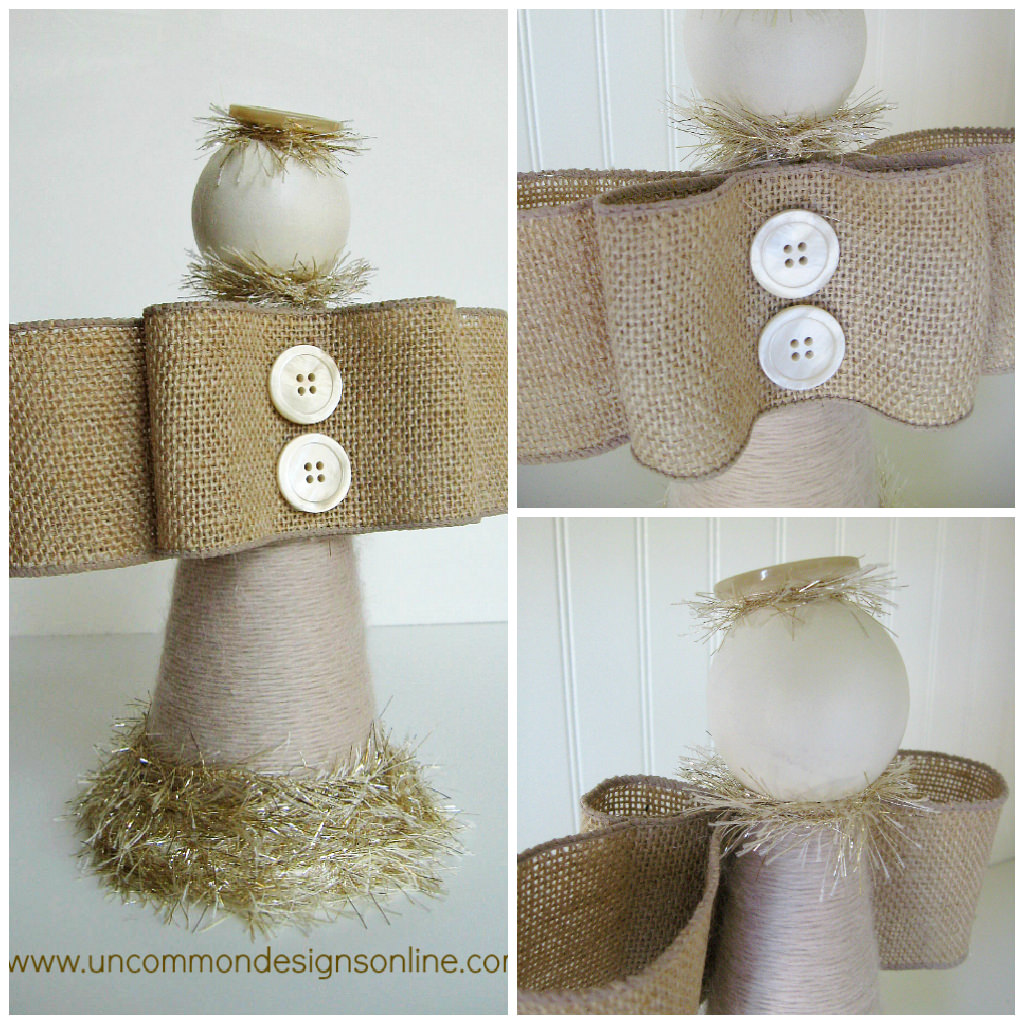
First, you will wrap the styrofoam cone with your cream yarn. I start at the top and worked down. Apply a little hot glue at the top to get started and then at the bottom to finish off. Spray paint the wooden disc and round wooden ball. Once they are completely dry, use your glue gun to attach the ball to the top of the styrofoam cone and the disc to the bottom of the cone. Next, wrap some of the eyelash yarn around the neck and around the bottom, attaching with a touch of glue from your glue gun.
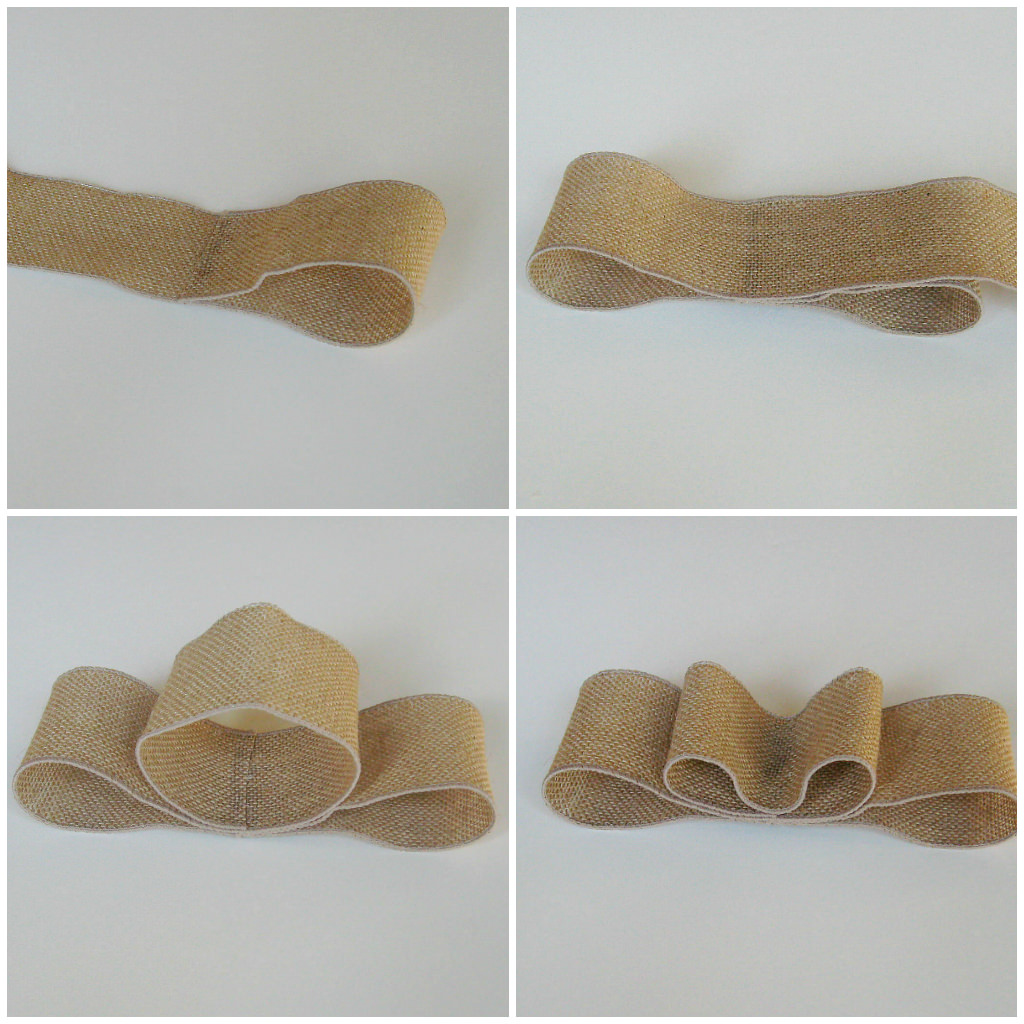
Next, let’s make the burlap bow for your Christmas Angel’s wings. Cut a piece of burlap wired ribbon. I simply estimated the length by the size wings I wanted. Fold over one end to the middle and glue down. Fold over the other side so that it is equal to the other loop and glue in place. Loop the end around to make a smaller loop in the center and glue in place. Finally, glue down the little loop in the center.
Now you will simply glue 2 of the cream buttons to the middle of the wings and then glue the wings to the back of the angel. I placed mine a little higher than halfway up on her back. The top of the burlap is about level with the top of the cone. Next, glue the larger cream button on her head as the halo. I placed it a little back on her head instead on directly on top. Once the button halo is dry, glue a little of the eyelash yarn around the button.
Here she is from the back all finished! I have her placed in my home where you can see the back as well, because it is just too cute to cover up! I love the little buttons!
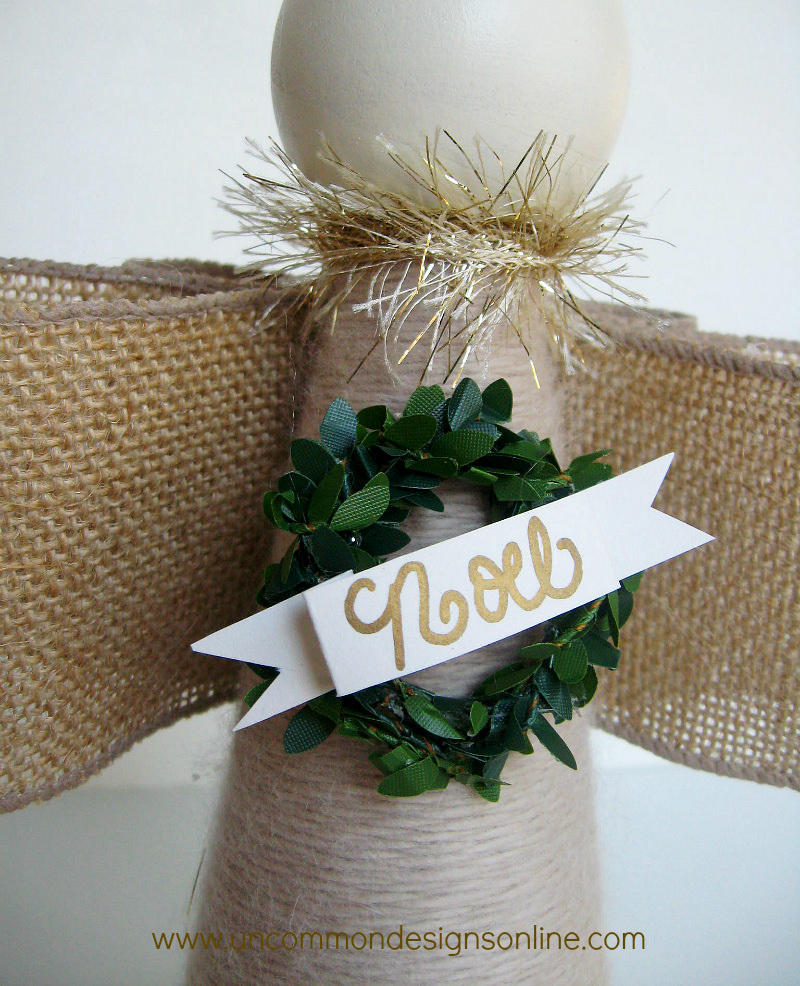
Finally, the last step is to make this sweet faux boxwood wreath and simple banner. I looped the mini boxwood garland around twice and twisted it closed. I then attached it to the angel with the glue gun. I made a quick little banner out of the cream card stock and free handed the word “NOEL” across it in gold. You really could do so many things to her to personalize your angel. She could be “holding” all kinds of things and you could change up the wording on the banner as well! I chose to not paint a face on her because I really wanted a simple look, but you could totally do a sweet little face with the sharpie!
I adore how our Christmas Angel turned out! We hope each of you is enjoying this holiday season with family and friends!
We would love for you to check out some of our other Christmas crafts using burlap, including our JOY Christmas Mantel and our Burlap and Twine Christmas Trees !
Bonnie
Trish Flake
Latest posts by Trish Flake (see all)
- Easy Leopard Painted Pumpkin - October 18, 2021
- Embroidered Swedish Dishcloths - May 3, 2020
- Easter Egg Decorating Party - March 21, 2020
How cute!
Precious! I love those button wings!
These are perfect for my mom! She has been asking me to think of a craft she can do with the cones she is accumulating from her knitting creations 🙂
Very prim and pretty angel. I found your blog on 52 Mantels’ Christmas Mantel Link Party 🙂
This angel is beautiful – I love the natural materials and neutral tones. Thanks for the tutorial!
Very cute! I love angels. This looks easy enough for a craft-impaired person like myself to handle 🙂
It looks so kuteeeeeeeeeeeeee…
My family will be make it.
Thank for share great idea!!!