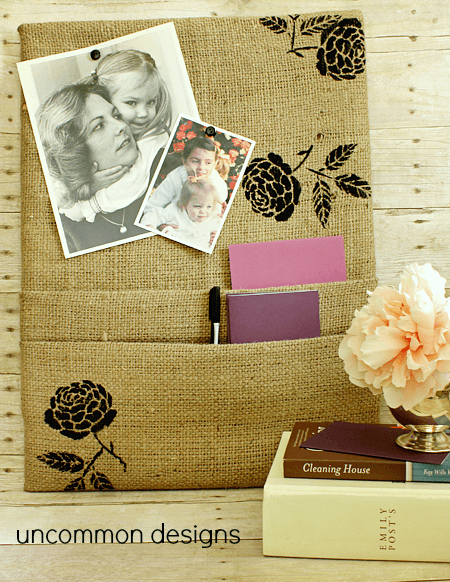
So it is pretty obvious that I love burlap. When I think about it, it is actually really plain, but like any canvas , once you add a little paint it comes alive and takes on an entirely new life. That is exactly what it has done with this burlap cork board.
Supplies needed to make your own burlap covered cork board:
- Burlap Fabric
- Cork Memo Board
- Hot Glue Gun or Staple Gun
- Acrylic Paint (I used Black)
- Stencil
- Paint Dabbers
- Iron
 Gather all of your supplies and get ready to have some fun!
Step One: First, iron your burlap well. After it is well ironed, lay your burlap down and either staple or hot glue the fabric to the top of the cork board. (I chose to use a staple gun, because it is super quick.) Next, staple or glue the fabric to the bottom of the cork board. You are going to use the edges of the burlap to do this, so expect to have excess fabric hanging off the board!
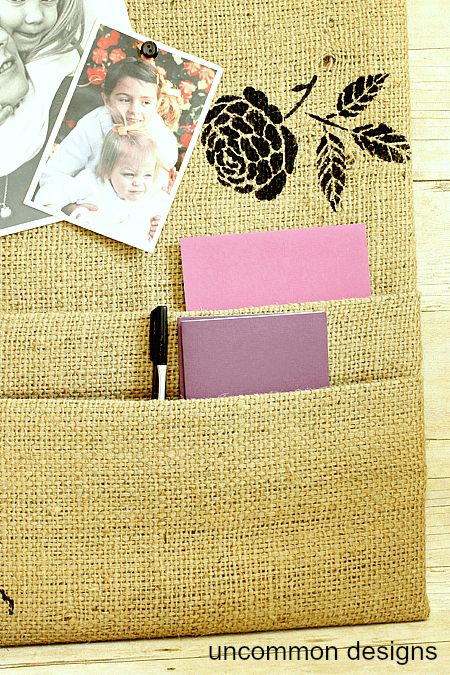
Step Two: Now it is time to make some pockets! On a flat surface, lay the cork board on its back side. To make pockets, simply fold the burlap like an accordion and iron it down flat. I chose to make a deep pocket at the bottom and then a slightly more shallow pocket above it.
Step Three: Now, lay the cork board on its top side and staple or hot glue the sides down to the back side. At this point, trim away any excess fabric. You are technically finished, but I think this needed a little jazzing up!
Step Four: I decided to use some basic black acrylic paint and these beautiful floral stencils to add a decorative touch to the cork board. Simply lay your stencil down and apply the paint with a stencil dabber.

Let it dry and your burlap covered DIY cork board is complete!
Hope you have fun getting organized with this pretty burlap cork board!
Trish Flake
Latest posts by Trish Flake (see all)
- Easy Leopard Painted Pumpkin - October 18, 2021
- Embroidered Swedish Dishcloths - May 3, 2020
- Easter Egg Decorating Party - March 21, 2020


Very nice work! Thanks for the tutorial!
Hugs!!!
Such a cute idea. I love the look of paint on the burlap.
Very cute! I love the look of the flowers on the burlap.
KC
What a great idea… and a fresh take on bulletin board! Thanks for the great tutorial!
I love burlap…and I love this easy tutorial, Trish! So classy!
Super cute Trish! I’m on board with anything burlap 🙂
This project is super cute, I see me making these for holiday presents. I love crafting with burlap. Roechelle @ http://www.hugatreewithme.com
Super cute!! I love the two pockets you made. Also, love the stenciled flowers to jazz it up. Thanks for the tutorial!! I love it!!
Love it! The folded pockets are a fabulous idea!! The stenciling could go in so many directions… Had to pin it to my burlap board!! (guess I love burlap too since I have a whole board devoted to it…)
Krista
really cute, what did we ever do without burlap! Love it!
Gorgeous! The stenciling really adds so much. It reminds me of a similar Pottery Barn board I pinned … I need to make one!
Hi I saw it on create & inspire party. I love the way the cork board came out. So pretty!
Julie from julieslifestyle.blogspot.com
I ADORE this project Trish! What a fantastic idea, and it turned out so beautifully!
What an adorable project! I found a bulletin board in the trash that I’ve been saving for the perfect project. I love the way you did this one. I’ll probably use mine in my 7th grade classroom and I know the kids will love it. I’m pinning and will share on my FB page.