Today on the Tuesday Trade-Off is Jennifer from Delightfully Noted. Y’all are going to love the Thread Wrapped Bangle Bracelets that she will be sharing with us today!
Greetings Uncommon readers! My name is Jennifer and I’m the head hancho behind the Delightfully Noted blog, my little corner of the world where I get to share my passion for all things creative and everything delightfully in-between.
I’m thrilled that Bonnie and Trish have allowed me the opportunity to share one of my favorite tutorials. In case you’ve been living under a rock, bracelets are every where; stacked, thin, chunky, colorful, they are e-v-e-r-y where! And with the holidays upon us what better time than now to throw together some lovely, handmade gifts for the special ladies in your life!
Materials for Creating a Thread Wrapped Bangle Bracelet…
- Chunky bangle {I found mine at Michael’s}
- 2 different colored but complimentary embroidery threads {ya know the kind you used for your friendship bracelets!}
- Gold 1mm elastic cord
- Scissors
- Glue Gun
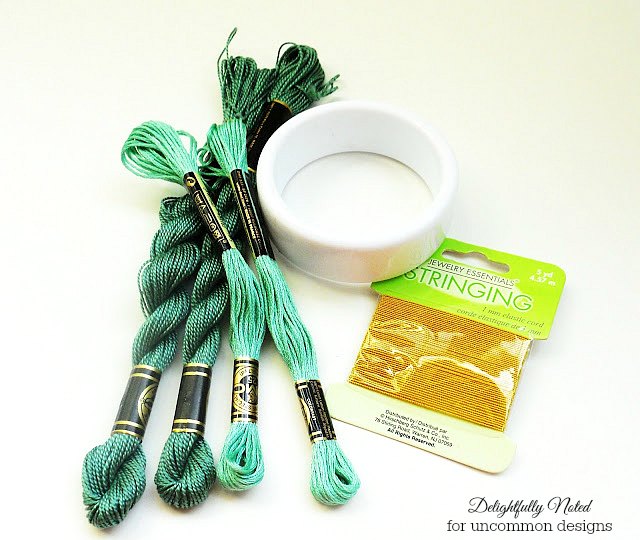
To get started, you’ll want to cut a few strands of your bangle’s primary colored embroidery thread. The length of the thread is not important as long as you cut all of them the same length and the amount you need to cut will vary depending on how chunky your bracelet is. My thread measured out to about 24 inches each and it took me about 1 whole spool of thread {27 yards} to cover my whole bangle.
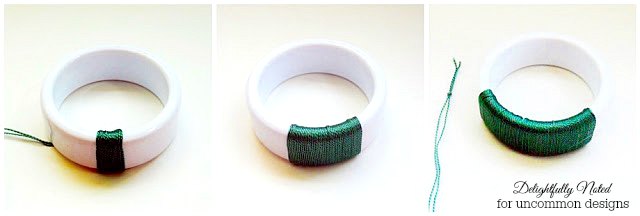
Now take two pieces of thread and combine them by tying a knot at the end. Do this until you have paired off all of your thread.
Take the knotted end of one these pairs and adhere it to the inside of your bangle with a little hot glue. Then start to firmly wrap the thread around the bangle. You’ll want the thread to lay tightly right next to each other.
Continue until you have wrapped the whole bangle in thread; adhering with glue inside the bangle here and there {never glue on the outside of the bangle, this will ruin the appearance}.
Now that the bangle is completely covered, it is time to add your second color of thread. I took the end of my light teal spool of thread adhered it to the inside of the bangle with my glue gun and then started to wrap. I wrapped the thread twice at each spot along the bracelet. This part is less time consuming cause you’ll want to space your secondary color out about an inch each twist as you wrap along the bangle.
I also wrapped this thread at a diagonal as I went along to give it more flair. Once you have gone all around the bracelet with your second color you can cut the thread and adhere the end to the inside of the bracelet with a tiny amount of hot glue.
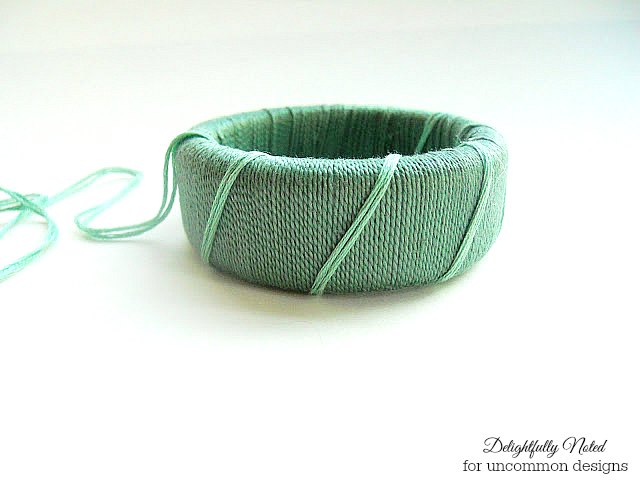
Time for your final step! Now take your gold elastic cord and repeat the steps you just completed with your second color wrapping the gold tightly next to it. Remember just like in the previous step you’ll want to wrap twice, move over about an inch, and wrap twice again; continue until you have gone around the whole bracelet.
Cut and adhere the end of the gold elastic to the inside of the bracelet once you have reached a full circle.
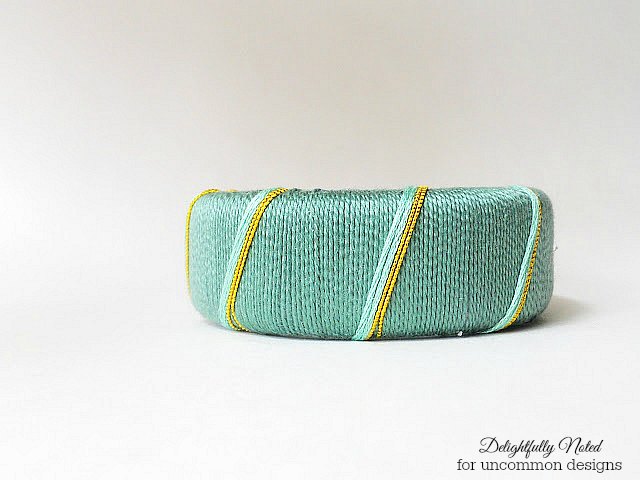
Isn’t she a beauty?
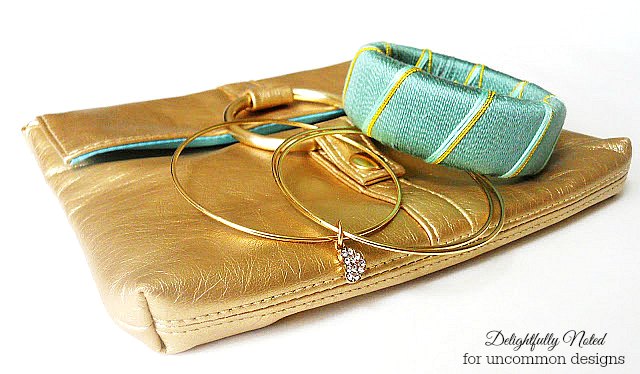
I also like the idea of stacking your bangles with other bracelets like the gold ones pictured above. Either way, I think we can all agree bangles are an easy and fun way to dress up your holiday look!
Trish Flake
Latest posts by Trish Flake (see all)
- Easy Leopard Painted Pumpkin - October 18, 2021
- Embroidered Swedish Dishcloths - May 3, 2020
- Easter Egg Decorating Party - March 21, 2020


This is so pretty! I have got to make one! Thanks for sharing such a great idea!
This is a gorgeous bracelet!!! Love the colors that are paired together! Very nice. Thanks for sharing!
Thanks for having me ladies!
Um I am dying over the gorgeousness of this bracelet!! I’ve never been one to try and make my own jewelry but I could totally do this!! And can we talk about that fantastic gold clutch for a second…LOVE! Great Job Jennifer!!!!
Super cute!!