Welcome to another week of our One Crafty Summer series here on Uncommon Designs. We are so happy to have a different blogger visit us each week during the summer, and share a fabulous project with our readers. In case you missed any projects, you can see them all HERE!
Take it away KC!
Hi Uncommon Designs readers!
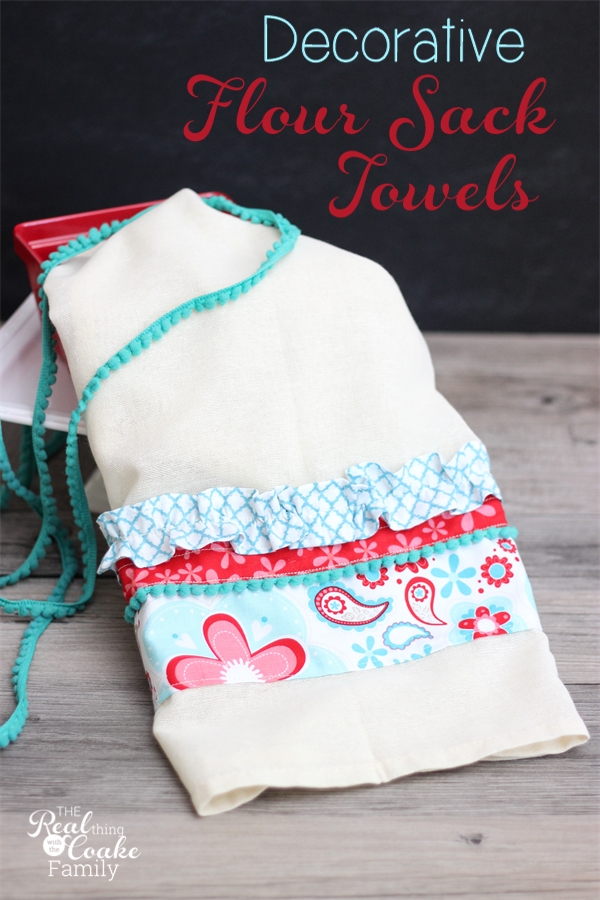
I’m happy to be here with you today. I’m KC and I blog at The Real Thing with the Coake Family. I love finding inexpensive ways to spruce up my house, whether it be for a season, a holiday, or just because. I decided to make a cute summer inspired flour sack towel for our kitchen or guest bathroom. I think it will be a cute way to add a small touch of summer to those rooms. Of course, I’ve got you covered with a tutorial so you can make your own cute towels.
Now I’m going to have you start with a super challenging task. You will need to go to the fabric store. ::Gasp:: This could be fun! I finally decided to splurge on some cute fabric from my local quilting store. Their fabrics are so cute and so nice, but I can’t usually justify spending double what I could get fabric for at JoAnn’s or Hobby Lobby. This project needed such a small amount of fabric, I thought it was a perfect time to buy some cute and more expensive fabric. You can also raid your fabric stash…but an excuse for new fabric is always a plus, right?
Are you ready to make your own flour sack towel? Let’s do this!
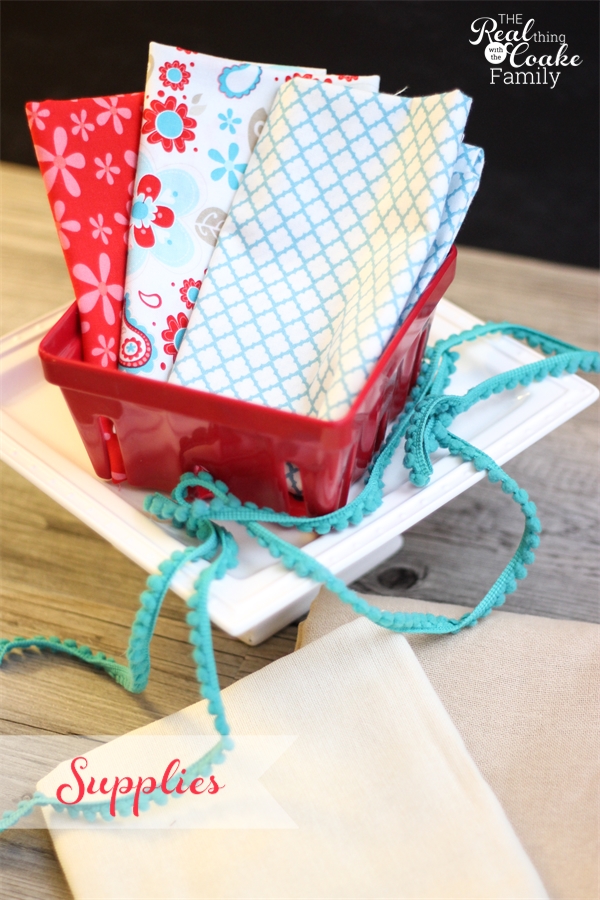
Supplies:
- Flour sack towels – I got mine at Cost Plus World Market. They are huge. Not sure I recommend them as I kind of wish I had used a smaller towel.
- 1/4 yard (or less) of each fabric to add to your towel
- Pom pom fringe (optional)
- Sewing Machine
- Thread
- Scissors
- Pins
Start by cutting out your three fabrics for your stripes. You will want to measure the width of your towel and add 1/2″ – 1″ for the length of your cuts. You may want the extra 1″ if you want to have a nice neat fold over the edge of your towel with these fabrics. I have a picture of that later in the post so you can see what I mean.
I cut my stripes at 1.5″ wide and 3″ wide. For the ruffle stripe, I doubled the length and cut it at 2″ wide. I was using 1/4″ seams, so all my finished sizes were 1/2″ less than the cuts I just described.
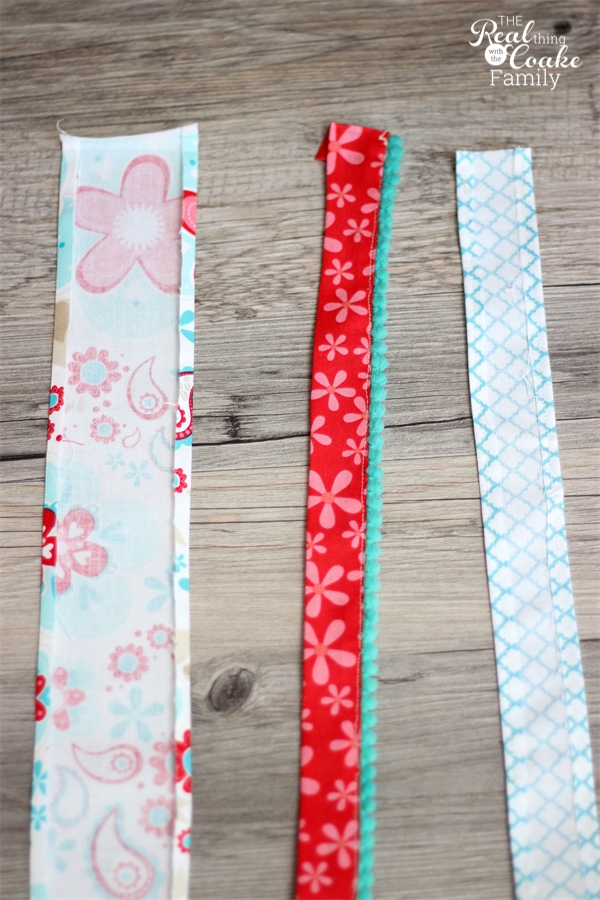
I like to get all of the tedious work out-of-the-way at the beginning. I usually have more patience at the beginning of a project, so it works for me. You can work one stripe at a time or you can do all the prep work and then put it all together like I did.
Using a hot iron, iron the 1/4″ hem into the top and bottom of all of your stripes. Iron your 1/4″ hem at the ends as well. If you are doing a neat fold over the edge of your towel, iron your 1/4″ hem at the end then fold it over again and iron to create a double fold of 1/4″.
Sew the hems on the top and bottom of the stripe that will become your ruffle.
Sew the pom-pom trim to the bottom edge of that stripe. Don’t worry about sewing the top of that stripe or the fattest stripe.
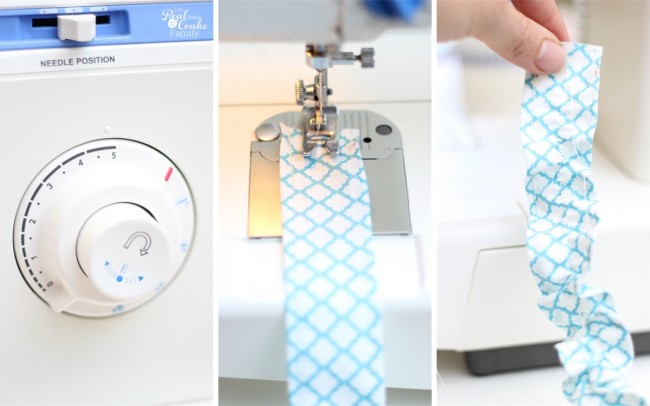
Set your machine to its longest stitch.
Sew straight down the middle of the stripe that you want to be the ruffle. Do not back stitch.
Gently use the threads at each end of this stripe to pull it into a ruffle.
Whew! Now we are done with all the prep work. It really wasn’t anything too hard. Just some details to attend to.
Now comes the fun part! Let’s put the towel together.
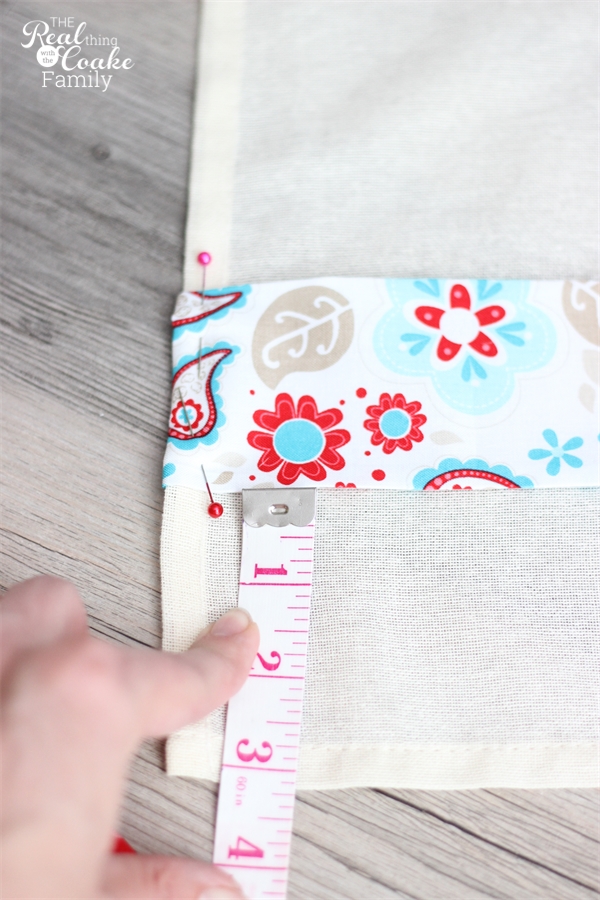
Measure where you want your bottom stripe to begin. I put mine at 3 1/4″. Use your measuring tape to line this stripe up at precisely this point all along. Pinning in place as you go.
Top stitch in place using a 1/8″ hem. By using the 1/8″ hem you will be getting the fabric that you ironed at 1/4″ and save yourself the time of hemming. It will also look better to see only the top stitching and not a hem and top stitching.
Because you lined up the bottom row so well, you won’t need to measure for this row. Just carefully line and pin-up the row with the pom-pom trim.
Top stitch at 1/8″
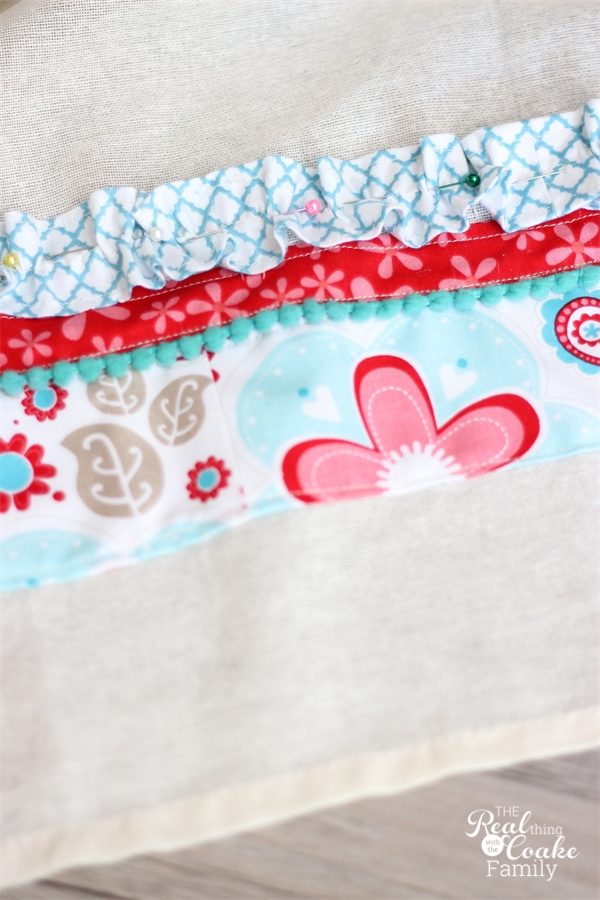
Finally, follow the same procedure for your ruffle row.
I had originally planned to have my ruffle at the bottom, but didn’t realize I had placed it in the wrong place until it was too late. Oh well, it still looks cute.
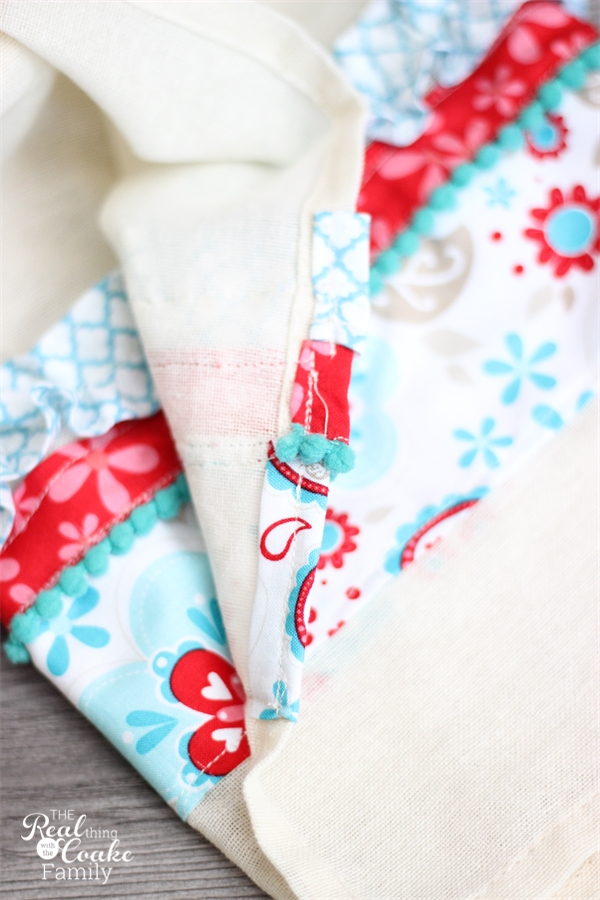
If you want polished edges for your fabric and towel, carefully fold the fabric around to the backside of the towel. make sure when you are topstitching that you secure these ends in place.
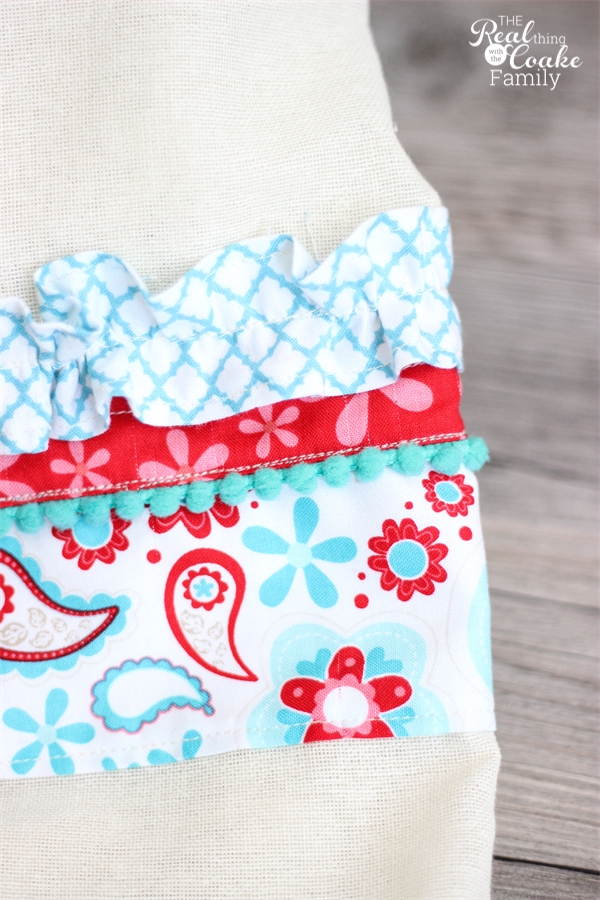
Love the fun and the colors of this towel! I know this towel isn’t overly summery, but the colors work for my house and our guest bathroom. I also think the colors work to add a summer touch.

What do you think? Summery or not enough to hit a summer look?
I think these towels are so stinking cute. I have a feeling I will be making some for fall, Christmas, etc., etc. Such an inexpensive way to add a little something for the season.
___________________________________________
KC is a creative, fun-loving , homeschooling mom of two adorable girls, 12 & 7. She has a passion for making special memories and special time with her family. When not cultivating fun for the family, she can be found crafting, creating something, organizing or sprucing up the house . She is also often found making something yummy in the kitchen , running, reading, or hanging at Starbucks! Whatever she is up to, you can guarantee she has a plan , which may be revised many times, a small budget ,and will get the job done. She will most likely blog about it and make sure to keep it real because she doesn’t do fake.
She blogs at The Real Thing with the Coake Family which is about living the creative life with her family, while keeping it real along the way.
Adorable, right!? KC is crazy talented! You will want to whip up a bunch of these cuties! Be sure to follow us here at Uncomon Designs and have these posts sent straight to you! You can sign up by clicking HERE. We hope that you are enjoying the One Crafty Summer series!
Trish Flake
Latest posts by Trish Flake (see all)
- Easy Leopard Painted Pumpkin - October 18, 2021
- Embroidered Swedish Dishcloths - May 3, 2020
- Easter Egg Decorating Party - March 21, 2020
Thanks so much for letting me be part of the summer series! And for the sweet things you said about me, too!
KC
Always love having you!!
I love, love, love this towel!! It’s perfect for my kitchen. It has all my colors! Love it!! Pinned 🙂