Welcome back to our “LOVE IS IN THE AIR” Valentine’s Series! We are thrilled to have you all stop by! Today we have a treat for you all from Cameron, who has the adorable blog…Homemade by Cameron! You are going to love her creativeness….take it away Cameron!!

Hello to all of you Uncommonly wonderful readers- I’m Cameron from Homemade by Cameron, where I share a lot of DIY tutorials from sewing and home decor to cleaning supplies,stuff I like, and a little bit of personal stuff.
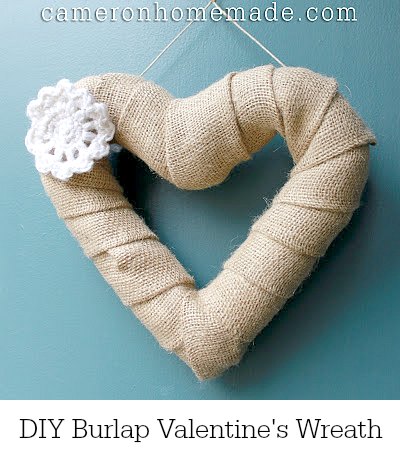
I am excited to be showing you sweet little DIY Burlap Valentine’s Wreath tutorial today. As any of you who already follow me know, I kind of have a lot of burlap – so this project will utilize just a little bit of that!

I did make my own wreath form – I thought it would be easier than it turned out to be! I did find some tips after I was done. So, use a serrated knife instead of scissors and it won’t look like someone chewed through your noodle/pipe insulation!
OK, to make your own wreath form, choose which kind of foam you want to wrestle – pool noodle or pipe insulation. I chose pipe insulation because it is January, and there are not a lot of pool noodles for sale at this time. . . also, it’s a little thinner, and I wanted to make a small wreath.
Pipe insulation comes in 6’ lengths from our local hardware store for a couple bucks, so it’s a pretty good deal, too. I cut a 32” piece off – to come up with this magic number, I kind of free-formed my wreath to see how much of the pipeinsulation I needed to make the size of wreath I wanted. . .precise, I know.
To make the curves of the heart, you’ll need to cut several crescent notches out of the INTERIOR of each curve – I just eyeballed these (again with that precision!) so I actually cut one more than I need on my first side – whoops! I knew my awesome and forgiving burlap would cover this glitch, so I wasn’t too sad that I’d already messed up. The serrated knife would have really come in handy at this point. Next time, I’ll do my research BEFORE I sit down to do a project!
The last cut you need to make is for the top of the heart – cut a v-shaped piece out of the center of your pipe insulation on the EXTERIOR of the curve. The narrower the v-shape, the narrower your heart will be.
Now, get out your glue gun and open a window, because the combination of hot glue and melting foam produces some wicked fumes. I glued the base together first and taped liberally with masking tape to hold in place.
Then, I glued the top together. More tape here – lots of tape! I also put a little glue in some of my notches to make the heart shape curvier. I may have passed out for a minute or two at this point – those fumes really were noxious. Maybe that’s a “pro” for buying a form at the store!
At any rate, this all firmed up pretty quickly, so I started on the fun part –wrapping! First, I cut several strips of burlap 6 ½” wide by the width of the fabric. I chose this width because that’s how wide my ruler is. I folded it in half lengthwise (so I had a strip 3 ¼” wide). Starting at the base, I wrapped the burlap around once and glued it to itself (no more melting foam fumes for me!). I made sure this piece went slightly beyond the tip of the heart’s base.
Just keep wrapping until you run out of burlap or get to the center of the heart. I got a little fancy here and stopped wrapping just short of the center, then started with a new piece at the base on the other side.
When I got to the middle, I folded my burlap so that both sides were folded under to make the center of the heart’s top look nice and neat.
For hanging, I used some hemp twine – first, tie knots in each end of the twin, then pin in place and make sure your wreath hangs straight (or crooked – however you’d like it to look!).
Then, I folded a couple of scraps of burlap up so I’d have some coverage for my attachment method. Put COPIOUS glue on top of the twine knots, then topped with those folded burlap scraps. Pieces of felt or fabric in a fun shape would be great for this step, too.
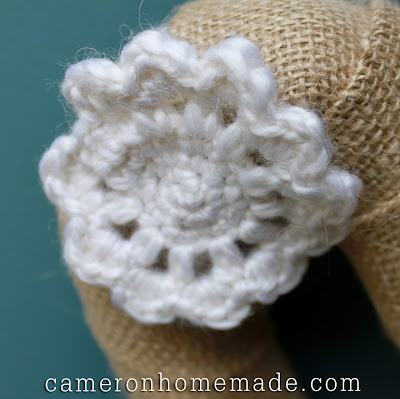
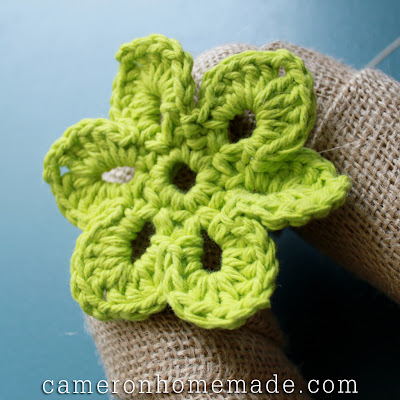
Finally – too embellish or not to embellish – this wreath needed a little something, but what? Because I’m a crazy crafter, I had these two crocheted flowers just laying about (I crochet when I watch TV – I have an inability to just sit and watch TV – it seems so unproductive).
But which one to use –green? It’s nice and bright, and I like it because I’m into non-traditional Valentine’s décor.
The white is pretty, too. It was made using a fuzzier yarn, which makes a nice contrast to the burlap. I like them both– which do you prefer?
Happy crafting, my friends!
Thank you so much Cameron. What a great tutorial. We adore burlap as well.
In case you missed any of our special “LOVE IS IN THE AIR” posts, you can see them here, here, and here!!
Trish Flake
Latest posts by Trish Flake (see all)
- Easy Leopard Painted Pumpkin - October 18, 2021
- Embroidered Swedish Dishcloths - May 3, 2020
- Easter Egg Decorating Party - March 21, 2020


That is one adorable (and creative) wreath! So fun!
Thank you! It was fun to make 🙂
Love your wreath!!! Great choice on the burlap and the crocheted flowers are perfect!!!!
Thank you, thank you – I do love to crochet!
I LOVE this project and the tutorial!!
Thanks! I hope you get a chance to try it out!
Thank you for allowing me to participate – this turned out great!