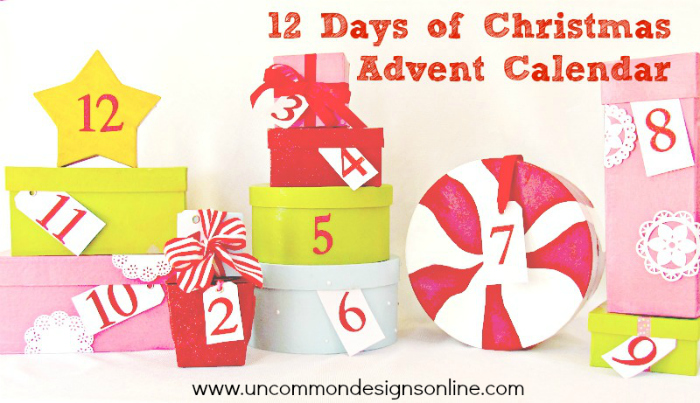
Did you want to start an advent tradition with your family with year, but didn’t get started? It isn’t too late to make a 12 Days of Christmas Count Down advent Calendar!
Today, we are going to show you how to make one! There are tons of advent calendar ideas out there, but this one won’t break the bank, is extremely versatile, and you can make it with basic crafting supplies and a few boxes.
Let’s get started…
12 Days of Christmas Count Down Advent Calendar
Here are the supplies needed to make your own 12 Days of Christmas Advent Calendar:
- Paper Mache Square Boxes
- Paper Mache Circle Boxes
- Paper Mache Star Box
- Paper Mache Square Wine Box
- Deco Art Acrylic Craft Paint
- Mod Podge Gloss
- Core’ dinations White Core Tags
- Embellishments: I used Queen & Co. Bling Pearls, Martha Stewart Crafts Shimmer Doily Die Cuts, Washi Tape and Grosgrain Ribbon
- Die Cut or Sticker Numbers 1-12
Step One.I used paper mache boxes because they are super sturdy, but they do use a load of paint to cover them. So, I recommend painting them with a coat of Mod Podge first. Then paint your boxes in whatever color you like! I painted each box with a couple of coats and then followed up again with another coat of Mod Podge. My kids even stepped in to help out with some of the painting!
 I hope that you enjoy making the 12 Days of Christmas Advent, I am so excited about being able to use mine in the upcoming weeks.
Trish Flake
Latest posts by Trish Flake (see all)
- Easy Leopard Painted Pumpkin - October 18, 2021
- Embroidered Swedish Dishcloths - May 3, 2020
- Easter Egg Decorating Party - March 21, 2020


Such a cute idea! Love the boxes!!!
how adorable! colorful and fun!
this is a really fun and family involved idea. thanks for sharing. I love all the different patterns, designs, and sparkliness 🙂
Wow, this came out super cute!!